Pretty Pink Posh

SSS Tropical Leaves!

Hey dear craft friends,
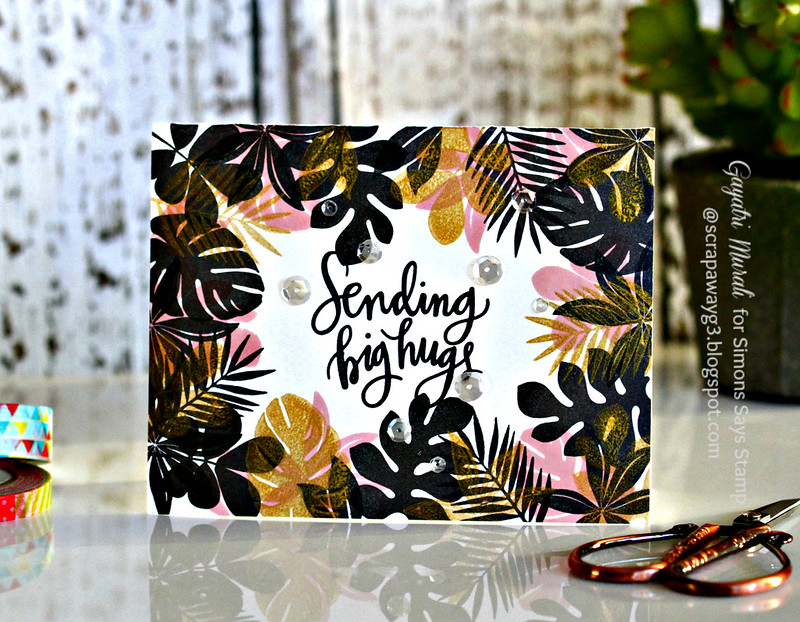
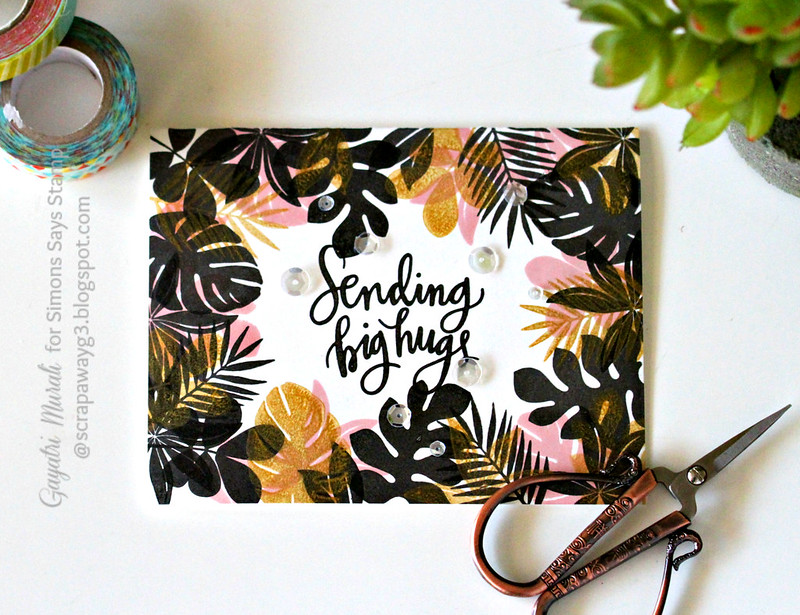
I am sharing couple of cards using SSS Tropical Leaves stamp set and coordinating dies from Among the Star collection. The moment I saw this set I really loved it and was waiting for them to arrive. When they arrived yesterday, I couldn’t wait to ink them. 
Sending Big Hugs//embedr.flickr.com/assets/client-code.js

In my package that arrived yesterday, I had bought the new Delicata Black Shimmer. I was desperate to try the ink. Although, I wanted to use the Tropical Leaves images in the traditional colours of greens and pinks, I decided not to because I want to use the black shimmer ink. So I went for a stylised design with black shimmer, gold and pastel pink colour combination. Also the inspiration for the colours came from the nail colours of my daughter Aditi and myself. I have Black sparkle in four of my finger nails and gold sparkle on the ring finger nail. My daughter has pink on her nails. We got them done today. Had a great bonding time!

On my first card I have stamped the leaves image from Tropical Leaves stamp set using Delicata Black Shimmer pigment ink, Delicata Gold pigment ink and Simon Says Stamp Twirling Tutu dye ink. I have layered my stamped images. Because the black and gold are pigment inks, I dried each layer before I stamped the next layer. Also make sure not to smudge the black pigment ink as it takes some time to dry. The sentiment is from Simon Says Stamp Big Scripty Greetings also stamped using Delicata Black Shimmer ink. This is essentially an one layer card except for the Sparkling Clear sequins from Pretty Pink Posh.

Absolutely love the black shimmer on the card. It is subtle but just beautiful especially under the light.

Sending Big hugs flat//embedr.flickr.com/assets/client-code.js

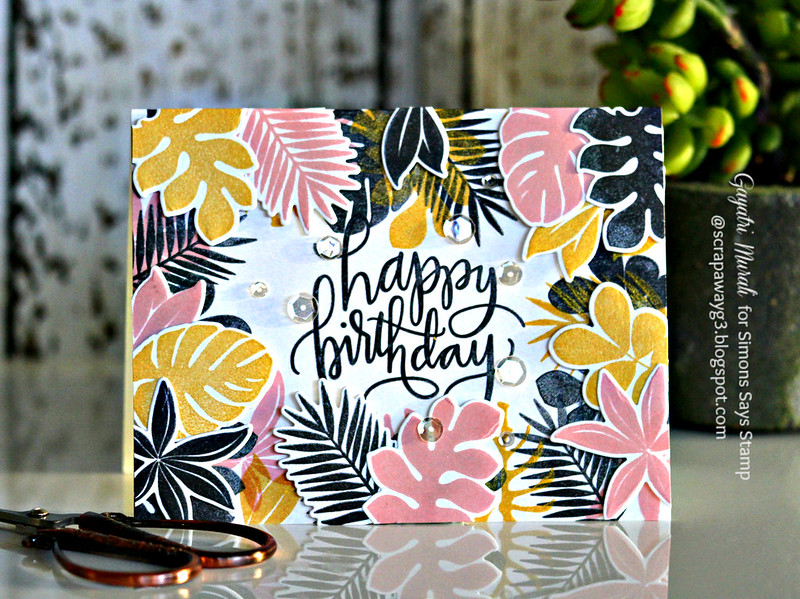
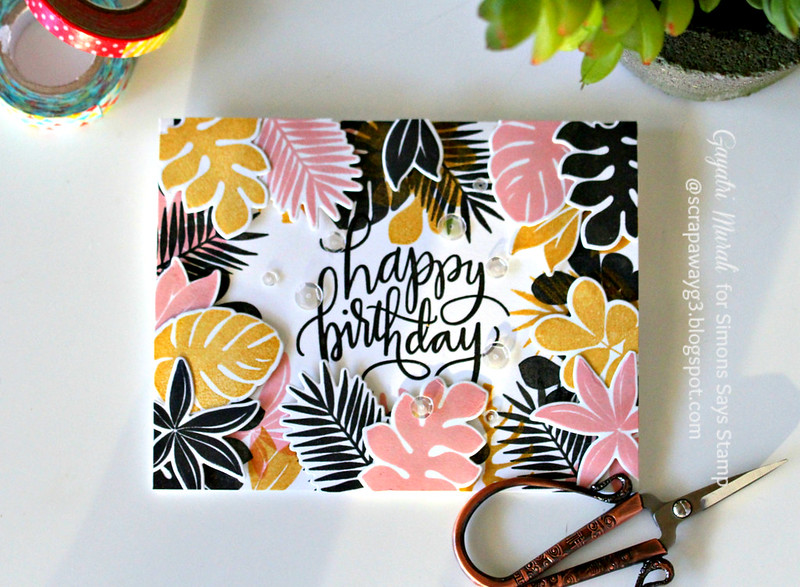
For the second card, I went one step further and added die cuts to give dimension.

So I stamped the leaves from Tropical Leaves stamp set similar to the first card. Then I also stamped a bunch of them using all the three colour on scrap piece of paper and die cu them out using the coordinating dies. Then adhered them in clusters using foam adhesives. Trimmed off the over hangs. Stamped the sentiment from Simon Says Stamp Big Scripty Greetings and embellished with Sparkly Clear sequins.
Love love the Tropical Leaves stamp set and coordinating dies and the Delicata Black Shimmer ink.

Card Supplies:

https://static.inlinkz.com/ppr.js

Thanks for stopping by today. Have a wonderful day or beautiful evening!

My blog signature

MFT

Guest Designing at My Favorite Things Blog – Day #3

This is my second post for the day. My Simon Says Stamp Wednesday Challenge post is HERE!

Hello everyone,

Welcome back! This is the final day of my guest designing at My Favorite Things Blog. I have couple of cards shared at the MFT blog, one of which I am sharing here with you.

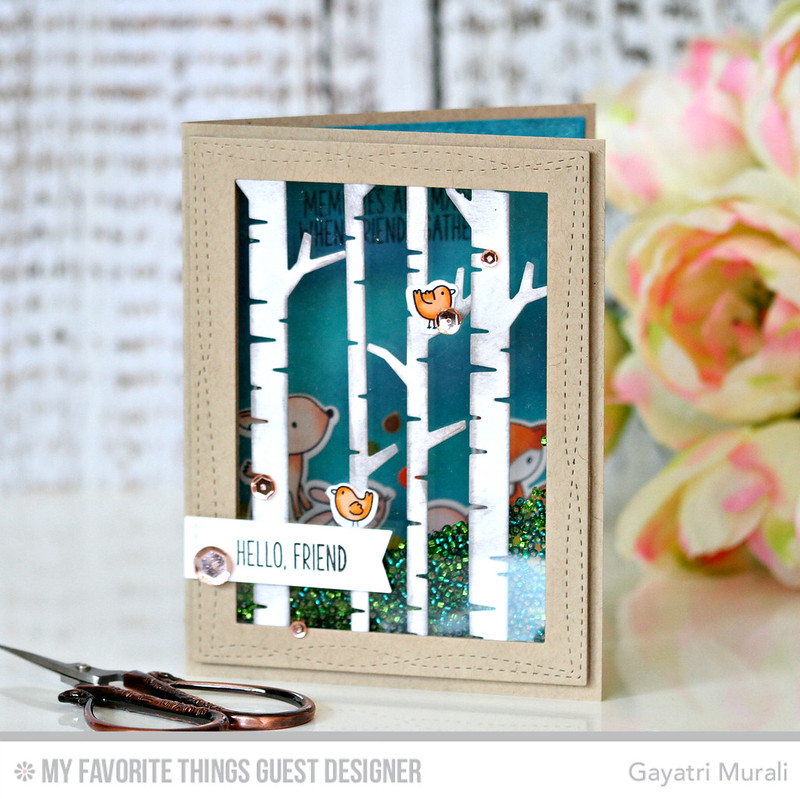
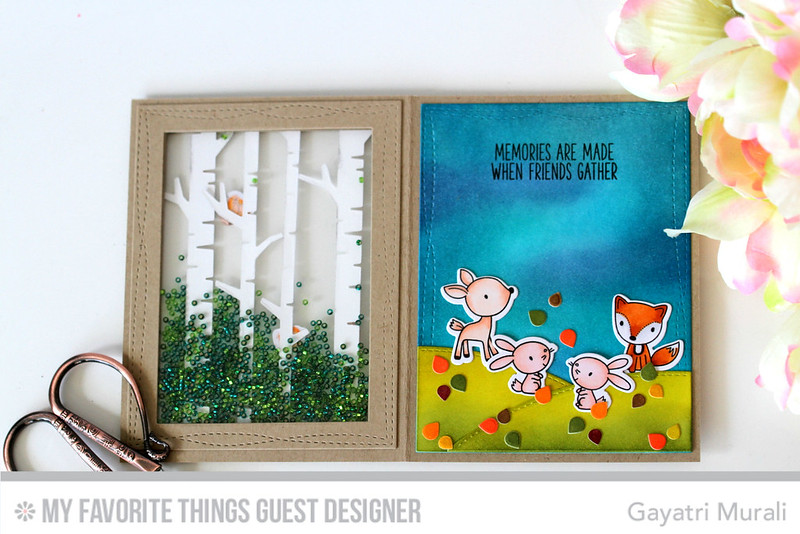
I was inspired byKimberly Crawford’s Peek a Boo window card. So I wanted to recreate it with my own twist to it. My twist is: I have added a shaker component to the window!
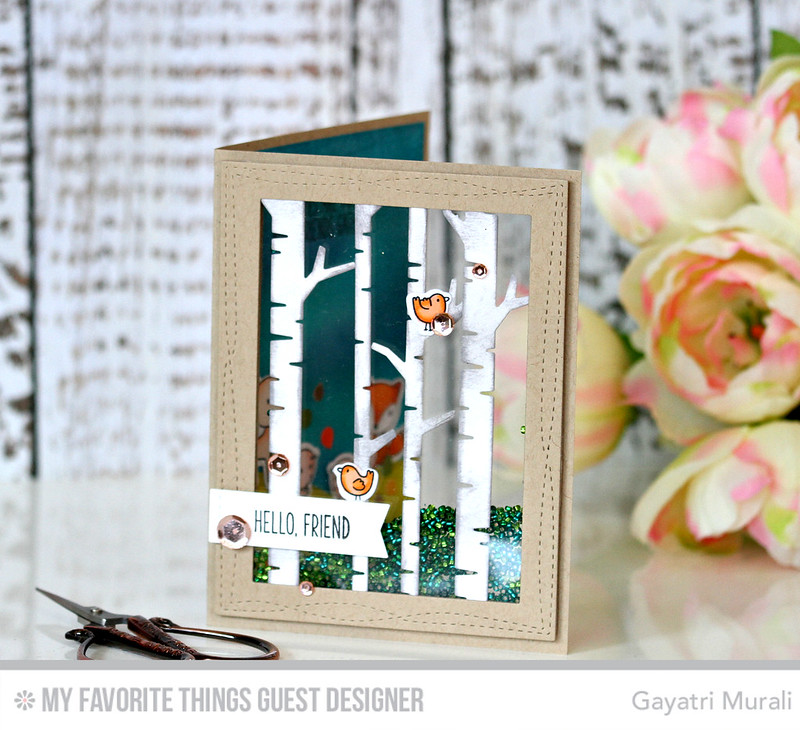
I started with making the window shaker element for the card. I die cut the die namics Birch Treewith Smooth White cardstock. Sponged Hickory Smoke distress inks to give a bit more realistic birch tree look. I die cut a Wonky Stitched frame using two Wonky Stitched Rectangle die namics and Kraft cardstock. I adhered a clear acetate sheet behind the Wonky Stitched frame then the birch trees die cuts. I also adhered couple of birds stamped, copic coloured die cut from Sweet Forests Friends stamp set. I also created another frame using Stitched Wonky Rectangledie namics and adhered acetate sheet behind it.

On a Kraft card base, I die cut a window on the card front using the second rectangle die namics. I adhered the birch tree panel I created on the card front using foam adhesives. After adding the Woodland Seed Beads, I adhered the second Stitched Wonky Frame panel behind the card front giving the window shaker box. I love this. So cool!

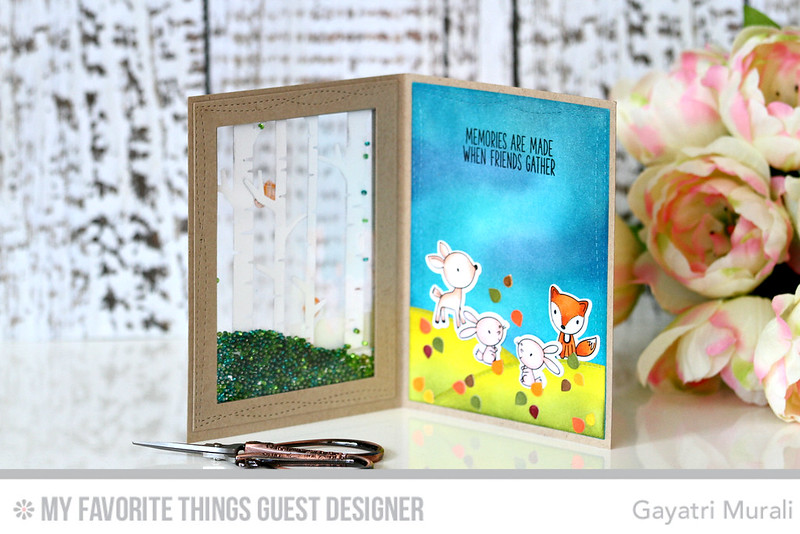
On the inside of the card, I die cut the largest Stitched Wonky rectangle die namics using SmoothWhite cardstock, sponged Faded Jeans and Peacock Feather distress inks on the background. Then I die cut the die namics Stitched Valley using Sour Apple cardstock, sponged Mowed Lawn distress ink and adhered on the bottom of the panel. I also added stamped copic coloured and die cut fox, deer and bunnies images from Sweet Forest Friends stamp set. The Birch Tree die namics also has these cute little leaves dies. I die cut them using Smooth White cardstock, sponged  autumn colours using distress inks and adhered them randomly on the landscape. Finally, I stamped the sentiment from the Sweet Forest Friend Stamp set on the top of this panel using Black LicoriceHybrid ink. For the front, I stamped the sentiment also from Sweet Forest Friend on Smooth White card strip, die cut using one of the dies from dienamics Blueprints 29 and adhered using foam adhesives. Finally embellished with Rose Gold sequins from Pretty Pink Posh.

Hello friend flat #1//embedr.flickr.com/assets/client-code.js

Hope you like my card. Head over to My Favorite Things Blog to see the other card. I throughly enjoyed working as Guest Designer for MFT blog and very thankful for the opportunity!

Thanks for stopping by my blog today!

My blog signature

Pretty Pink Posh

Simon Says Anything Goes!

wed-newchallenge-header
Hi all and welcome to another week on the Simon Says Stamp Wednesday Challenge
Thank you for joining us for the Add Some Shimmer Challenge and we hope you will all join us again this week too.
We will be back soon with the name of the lucky winner of the $50 Voucher
This week the challenge is

ANYTHING GOES

We are showcasing Art Impressions Products this week. You don’t have to use them to join in but if you have some we would love to see them used
As always Simon Says Stamp will be giving away $50 voucher to shop at the fabulous Simon Says Stamp Store
50dollar_voucher_600px
Here is my card for the challenge.


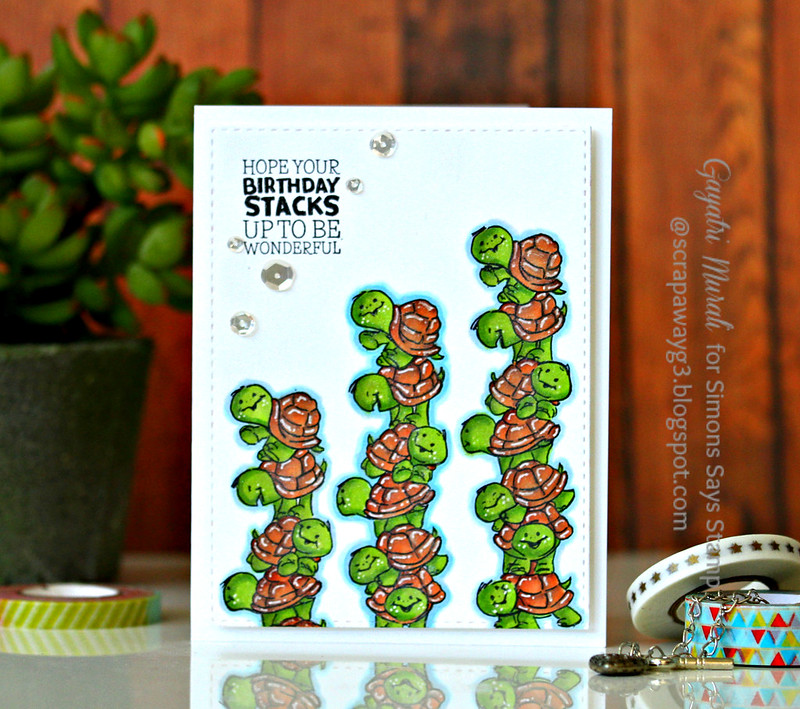
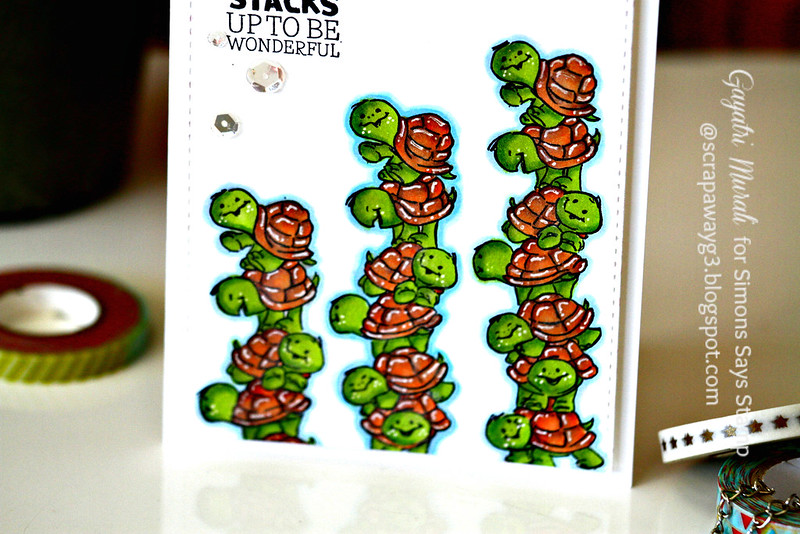
I absolutely love these cute stacked animal stamp set from Art Impressions. I have used Art Impressions Turtle Stackers on my card. I have simple stamped these in three columns using Simon Says Stamp Intense Black Ink. I then coloured them using copic markers, added highlights using white gel pen. I also added blue haze around the images to make them pop out of card. I then die cut the panel using the largest of the Stitched Rectangle die from Simon Says Stamp. Stamped the sentiment on the top left corner using SSS Intense Black Ink and enbellished with Pretty Pink Posh Sparkly Clear sequins. Here is a closeup. I love the smile on all these cute turtles.

Turtle card closeup1//embedr.flickr.com/assets/client-code.js

So now it’s YOUR turn.  Happy Crafting
Do you use Instagram ?  If so please add  #ssswchallenge to your challenge entry uploads so we can see them on there too !
There are fabulous Give Aways and inspiration from fabulous designers on a daily basis over on the Simon Says Stamp Blog , if you haven’t subscribed by email you may want to so you don’t miss out.

Simon Says Stamp
You have until Wed  8am Ohio time. 1pm UK time, 2 pm CET to join in
No backlinking allowed, Only 5 new creations will be eligible in the prize draw
word-verif
Card Supplies:

https://static.inlinkz.com/ppr.js

Thanks so much for stopping by today!
My blog signature
MFT

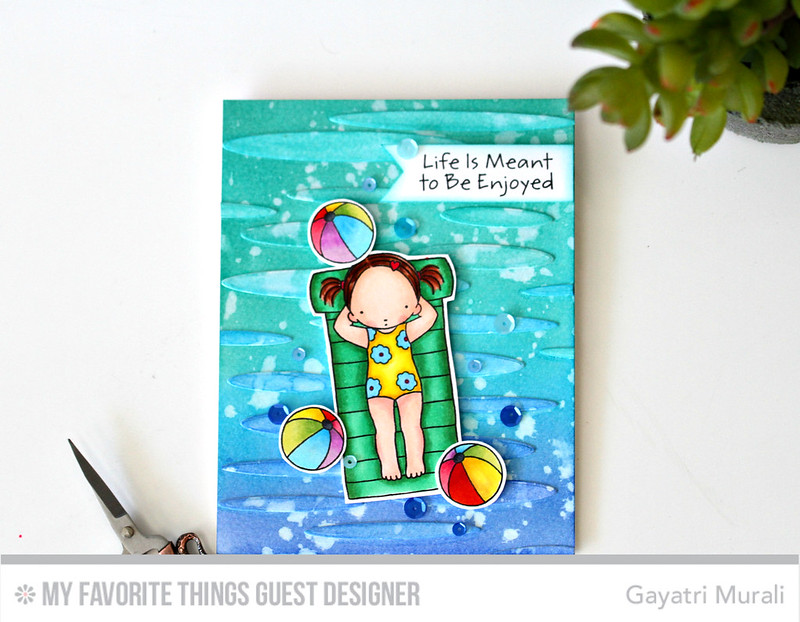
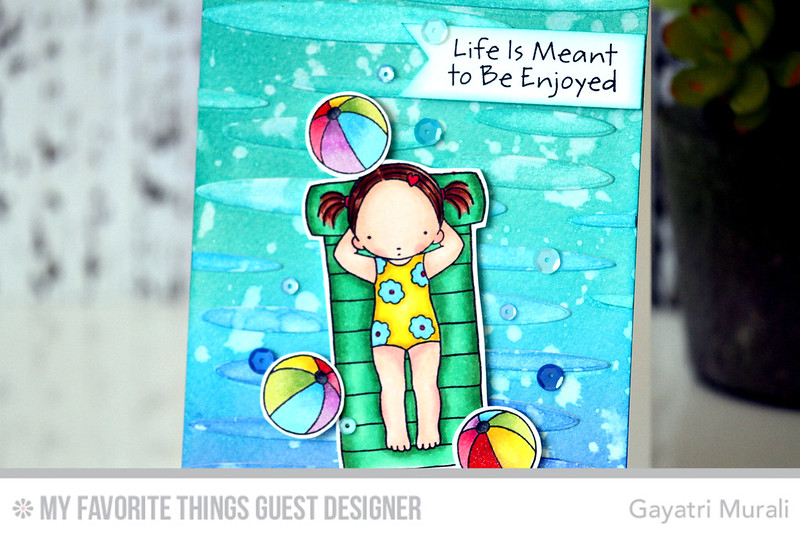
Life is meant to be enjoyed! Day #2 Guest Designing at MFT

Hello and welcome back! This is my second day of guest designing at My Favorite Things Blog.
I am sharing two more cards at the blog using Pure Innocence stamp sets. Here is one of the cards I shared today.
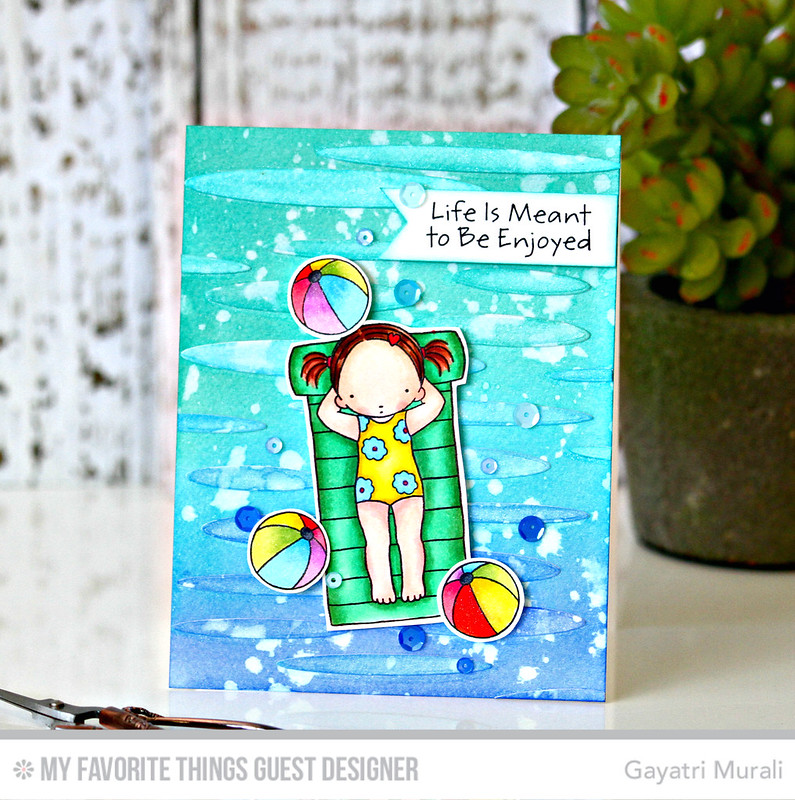
I started with stamping and copic colouring the images from Pure Innocence Fun in the Sun stamp set. Then I hand cut them out as I don’t have the matching die. If you have the matching die, die cut the images using them. I used one of the flowers from the Sweet ForestFriends stamp set to stamp and add pattern to the girl’s bathers.

For the background, I trimmed two Tim Holtz watercolor paper to the size of the card front. I sponged Peacock Feather, Evergreen Bough and Blueprint Sketch distress inks on both the watercolour papers.  I spattered clean water on both of them and dabbed the water off with a cloth to get texture on the panels. One panel I adhered on a Smooth White card front. I ran the second panel into my die cut machine using the Oval Shadows die namics.  I adhered these oval shadows randomly to achieve waves, extra dimension as well as texture to the card front. I brushed clear shimmer using Wink of Stella clear shimmer pen. 
I adhered the images from the Fun inthe Sun stamp set using foam adhesives. The sentiment is simply stamped on a strip of Smooth White cardstock, trimmed fishtail end and adhered. Finally embellished with Pretty Pink Posh Cobalt, Aquamarine and Ocean Spray sequins.

Check out MFT Blog for the second card. Hope you like this one.

Thanks for stopping by today!

My blog signature
Uncategorized

Simon Says Add Shimmer!

wed-newchallenge-header
Hi all and welcome to another week on the Simon Says Stamp Wednesday Challenge
Thank you for joining us for the Animal Magic Challenge and we hope you will all join us again this week too.
This week the challenge is

ADD SOME SHIMMER 

We are showcasing Lindy’s Gang Products this week. You don’t have to use them to join in but if you have some we would love to see them used. The lovely people at Lindy’s Gang sent all of the DT a parcel of samples to use, thank you so much, we really appreciate them!
As always Simon Says Stamp will be giving away $50 voucher to shop at the fabulous Simon Says Stamp Store
50dollar_voucher_600px

I love Lindy’s Gang products. I received the Mermaid Seashells Magical set. Gorgeous watercolour pigments in cute jars. Love the intensity of the colours and shimmer in them. Thanks you so much for the lovely products. Appreciate your generosity. This is my first time using such pigments and had great fun with it. I made couple of cards using them.


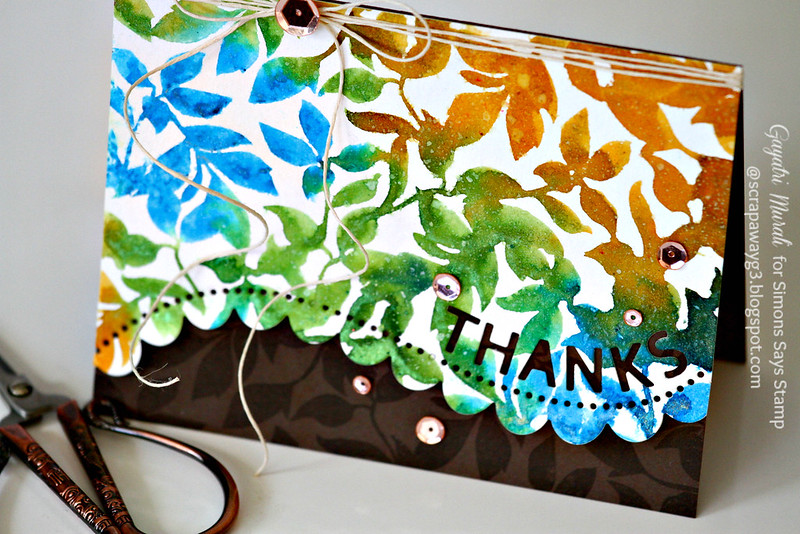
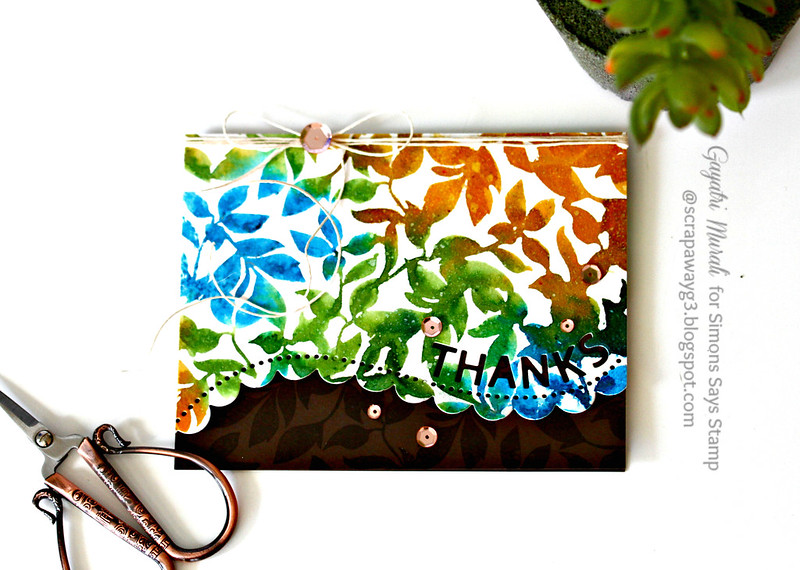
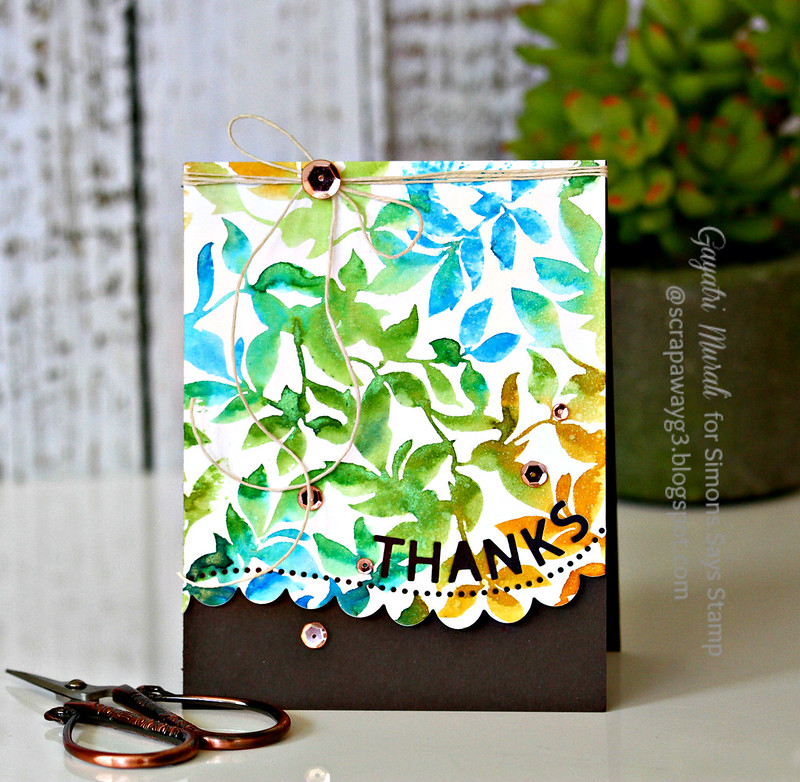
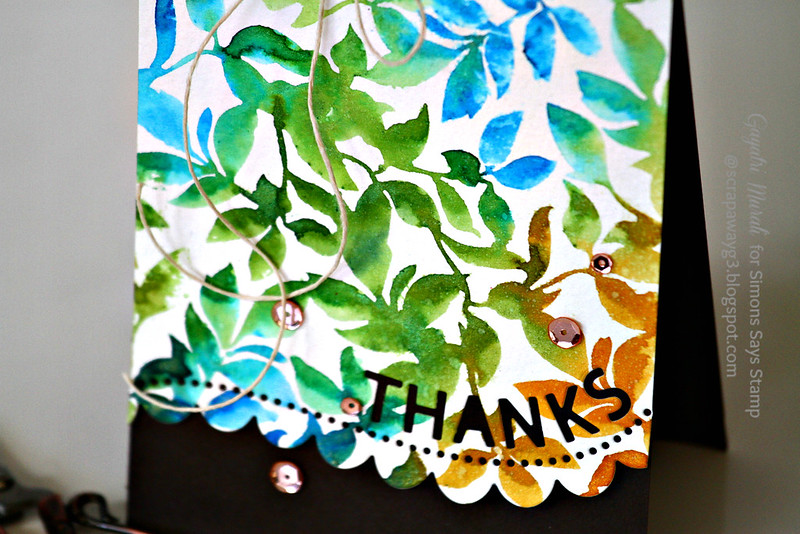
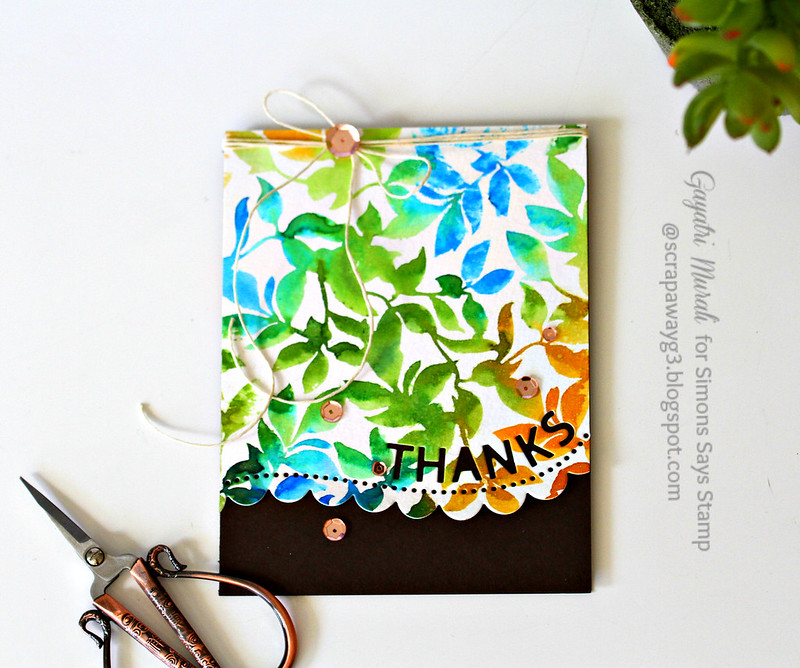
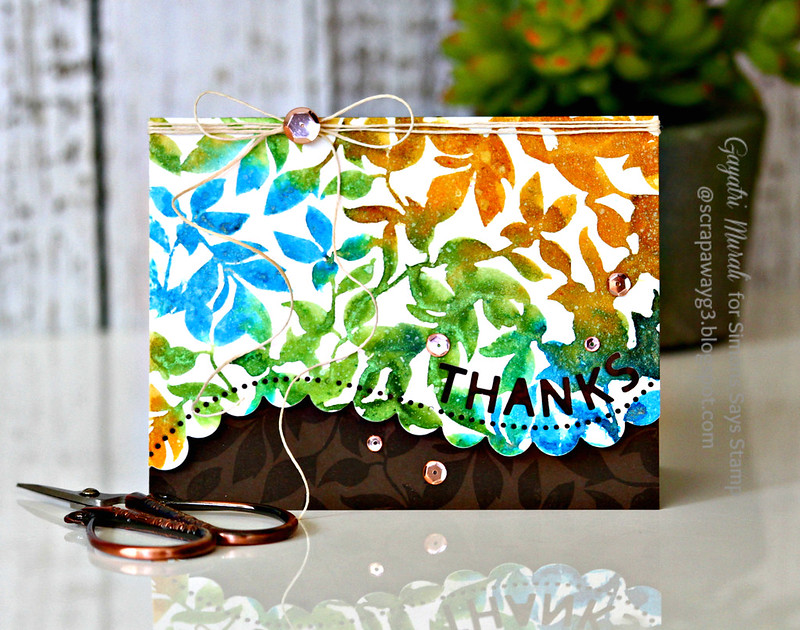
For both my cards, I used Simon Says Stamp Leaves cling background stamp. I put a pinch of the powders from the Mermaid Seashells Magical set on my watercolour palette and added few drops of water to make a viscous paste so I was able to brush the colours using watercolour brush on to the leaves background stamp. I used Azure Sea Asters, Cocklebells Corall, Glory of the Sea Gold and Sea Mint Green pigments. I randomly applied the colours and blended them. Since I was using them for the first time, I was slow in applying. The colours dried on me but I was able to bring them back by spritzing water on them as they are watercolours. I stamped on Strathmore watercolour paper. Wow! That was gorgeous to see the colours with shimmer.  There was enough pigment on the stamp that I spritzed water on it to stamp on another watercolour paper. The impression was softer than the first which you can see on my second card. I thihnk if you like a softer look, you can go for another impression. There is enought pigment to get three images with just one application.

Thanks closeup//embedr.flickr.com/assets/client-code.js

//embedr.flickr.com/assets/client-code.js
I also sprayed clear shimmer on the both the panels to get extra shine on them. Once dry, I die cut the panels using Thanks Scallop border die from Simon Says Stamp. I die cut one panel horizontally and the other vertically. Since the border die has the sentiment already diecut on them, I didn’t feel the need to add more sentiment. You could add a secondary sentiment if you like. For my horizontal card, I stamped the same leaves stamp using Simon Says Stamp embossing ink to get tone on tone background on the brown card base. I adhered the stamped die cut panel on the top of the card base, used natural twine to tie a bow and embelished with Rose Gold sequins.

Thanks shimmer card flat//embedr.flickr.com/assets/client-code.js
For my second card, I used the the vertical stamped and die cut panel. You can see he colours are much softer than the previous card. This is second generation stamping. I love this because you can see some areas with intense colour and fading to the soft. Love that effect which also adds to the texture of the panel.

Thanks vertical card//embedr.flickr.com/assets/client-code.js

I actually made this card first. So I adhered the panel on the brown card base. After adhering I felt the base below the stamped panel felt a bit plain. That is the reason I stamped the Leaves image with embossing ink to get the tone on tone effect for the previous card.  Just a variation. I like both though.

Thanks vertical closeup//embedr.flickr.com/assets/client-code.js

I did exactly the same for this card as well. Used the natural twine to tie a bow on top of the card front and embellished with Rose gold sequins from Pretty Pink Posh.

Thanks vertical flat 1//embedr.flickr.com/assets/client-code.js

//embedr.flickr.com/assets/client-code.js

So now it’s YOUR turn.  Happy Crafting
Do you use Instagram ?  If so please add  #ssswchallenge to your challenge entry uploads so we can see them on there too !
There are fabulous Give Aways and inspiration from fabulous designers on a daily basis over on the Simon Says Stamp Blog , if you haven’t subscribed by email you may want to so you don’t miss out.

Simon Says Stamp

You have until Wed  8am Ohio time. 1pm UK time, 2 pm CET to join in
No backlinking allowed, Only 5 new creations will be eligible in the prize draw
word-verif
Card Supplies: 

http://static.inlinkz.com/ppr.js

Thanks for stopping by my blog today!
My blog signature
Uncategorized

Hello Flamingo! Simon Says Stamp Among the Stars release!

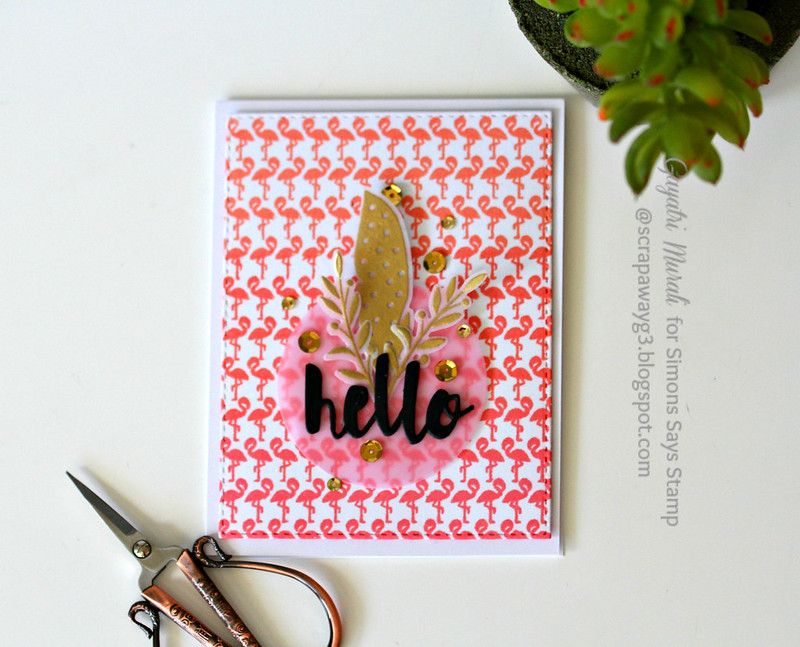
Hello everyone, I am sharing a card I made using the flamingo background stamp set from Among the Stars collection released by Simon Says Stamp.

Among the Stars 928x408 Blog Hop

I love flamingos and they are trendy at the moment. I can see them everywhere. In the newly released collection there is a beautiful flamingo background stamp which I have used on my card.

Hello flamingo card
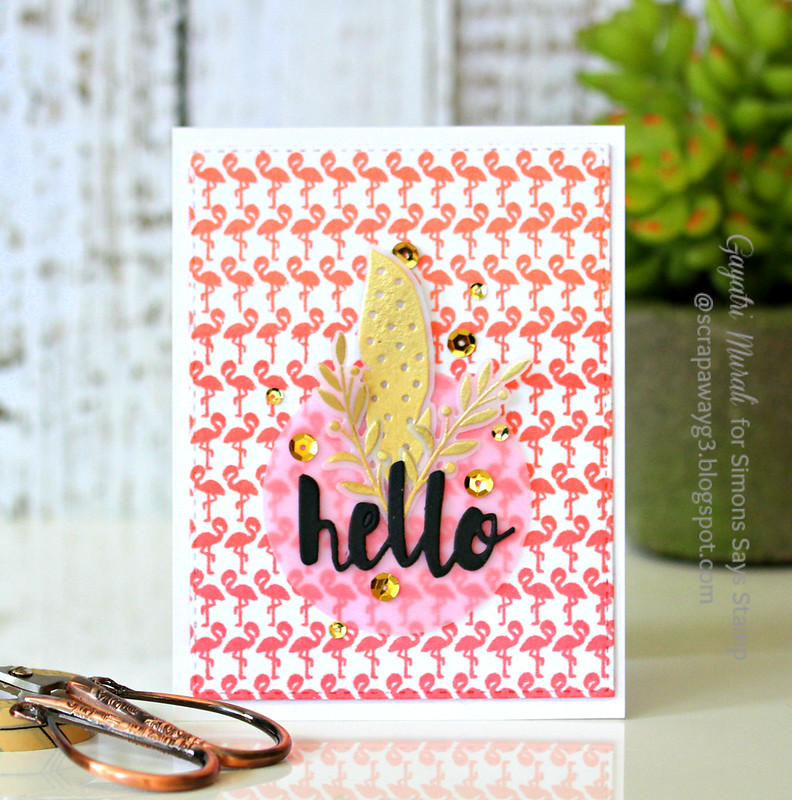
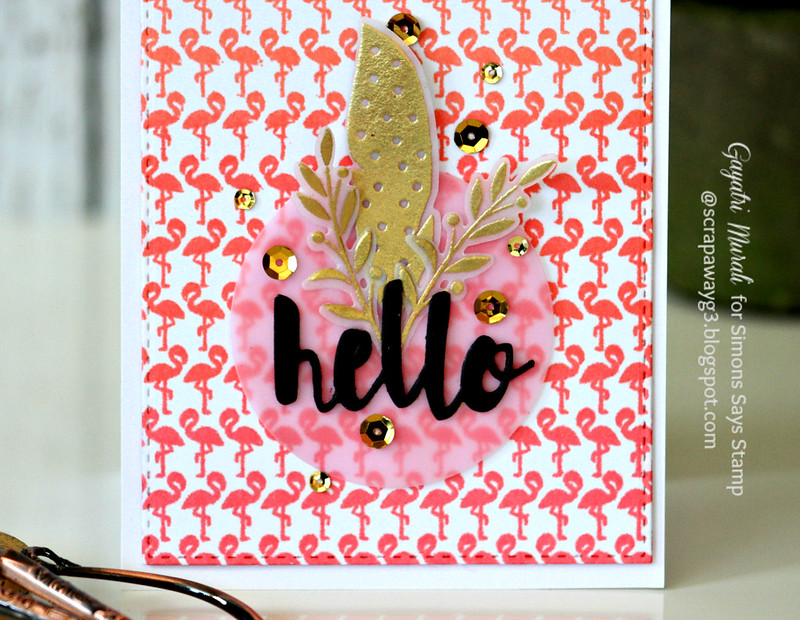
I wanted to see pink flamingos and so used Simon Says Stamp Teenie Bikini, Hero Arts Fresh Peach and Soft Cantaloupe ink in ombre to ink the stamp and stamp on Neenah Solar white cardstock panel. I used MISTI to stamp so I could double stamp to get even coverage. Then I used Simon Says Stamp largest Stitched Rectangle Die to die cut the stamped panel.

Hello flamingo card closeup//embedr.flickr.com/assets/client-code.js

For the focal point, I die cut a circle out of pink vellum paper. The sentiment is Painted Hello die from Simon Says Stamp which I die cut three time and stacked glued them for dimension. The feathers and twigs are from Oh Happy Day stamp set from Simon Says Stamp. I gold heat embossed them on vellum cardstock and die cut them out using coordinating dies. I them adhered these behind the Hello die cut sentiment which is adhered on the vellum circle and the whole cluster is adhered to the stamped panel using foam adhesives. Finally embellished with gold sequins from Little Things by Lucy Bright Copper collection.

Hello flamingo card flat//embedr.flickr.com/assets/client-code.js

I absolutely love this stamp set. I made lots of background panels using various techniques using this background stamp. Hoping to use them and make more cards. Will share as soon as I make them. Hope you like this card.
You can get all the new stamp set and dies from Among the Stars collection at Simon Says Stamp Store.
Thanks for stopping by today.
My blog signature
Paper Smooches, Pretty Pink Posh

Simon Says Animal Magic!

wed-newchallenge-header

Hello, all! Welcome to another week on the Simon Says Stamp Wednesday Challenge!
Thank you for joining us for the Father’s Day/For A Guy Challenge! We loved seeing your fun and innovative designs this week! Please join us this week for our brand new challenge!
We will be back soon with the name of the lucky winner of the $50 Voucher.
This week the challenge is…

ANIMAL MAGIC

We are looking to the animal kingdom for inspiration for our ‘Animal Magic’ projects! From butterflies to buffalos, kittens to kingfishers, we will be looking forward to see which animal you choose for your project!
Many of us have fur babies that are very much a part of our family and we would love to know what little critters live with you! Maybe you could add photo’s of them on your post too!
We are showcasing Paper Smooches Products this week. You don’t have to use them to join in but if you have some we would love to see them used.
As always Simon Says Stamp will be giving away $50 voucher to shop at the fabulous Simon Says Stamp Store.
50dollar_voucher_600px
This is my take on the Animal Magic challenge.

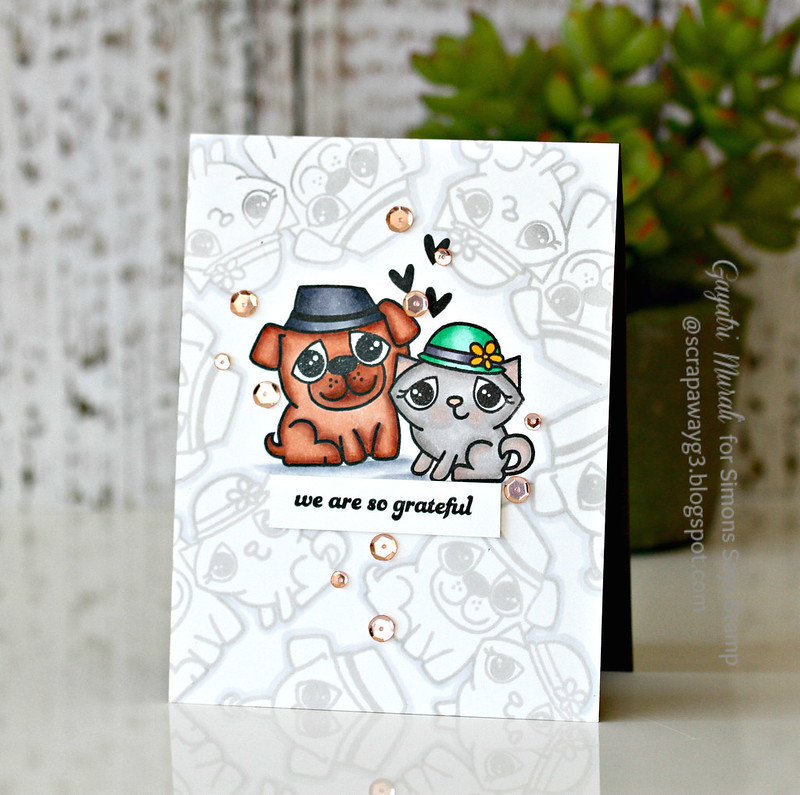
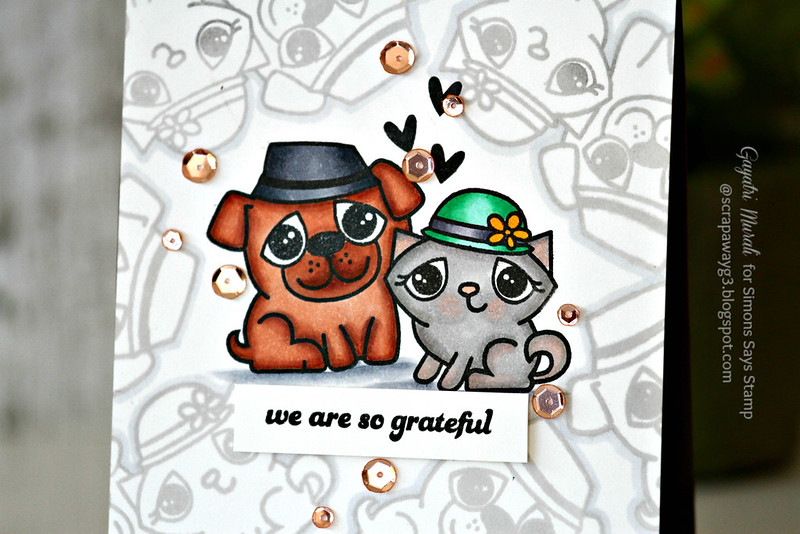
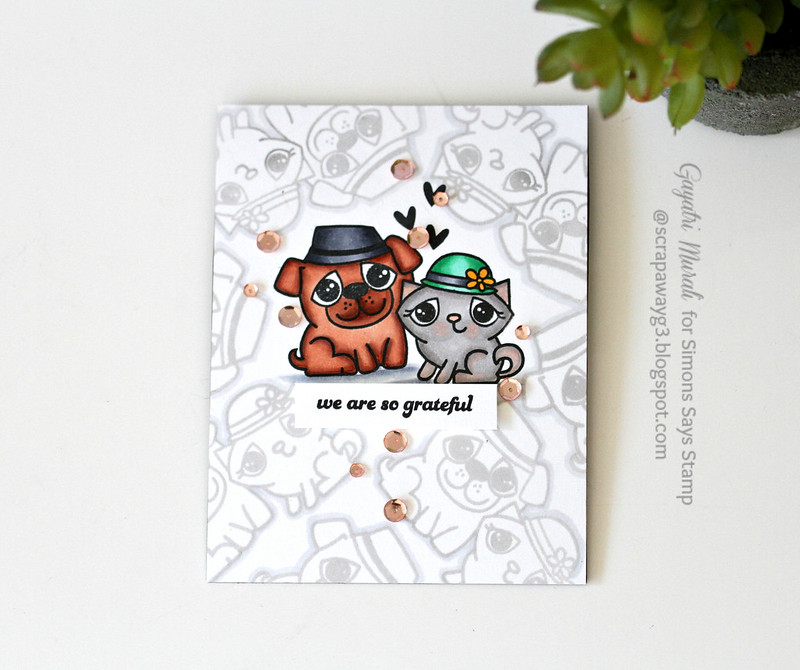
I have used We Adore You stamp set from Paper Smooches to make my card. My card is nearly one layer. I stamped the focal point image using Simon Says Stamp Intense Black Ink and stamped the rest of the background with the same image with Simon Says Stamp Fog ink. I copic coloured the focal image and outlined the background images using C1 marker. I grounded the focal image and adhered the sentiment strip using foam adhesives.

We are so grateful closeup

I embellished with Rose Gold 6mm and 4mm sequins from Pretty Pink Posh and adhered the panel on brown card base.

We are so grateful flat//embedr.flickr.com/assets/client-code.js

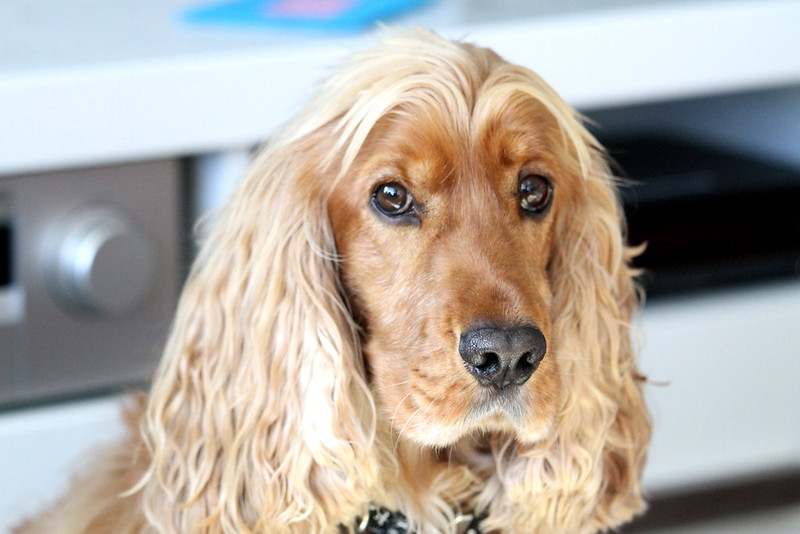
I tried to colour the dog image on my card similar to my dog colour.  This is Charlie, my third child. Totally pampered pooch at home. We love him and cannot imagine life without him.

So now it’s YOUR turn.  Happy Crafting!
Do you use Instagram ?  If so please add  #ssswchallenge to your challenge entry uploads so we can see them on there, too!
There are fabulous Give Aways and inspiration from fabulous designers on a daily basis over on the Simon Says Stamp Blog , if you haven’t subscribed by email you may want to so you don’t miss out.
Simon Says Stamp
You have until Wed  8am Ohio time. 1pm UK time, 2 pm CET to join in
No backlinking allowed, Only 5 new creations will be eligible in the prize draw
word-verif

My blog signature

Taylored Expressions

Let’s Chat!

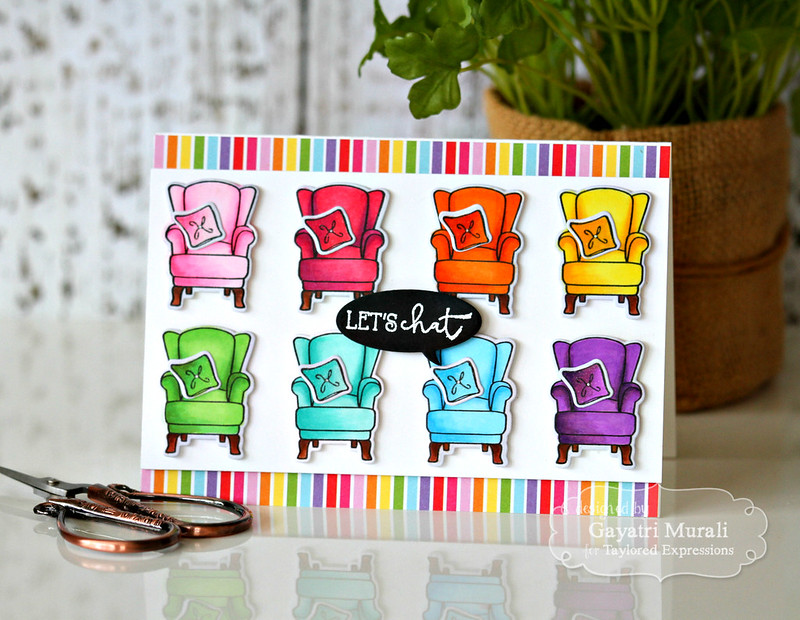
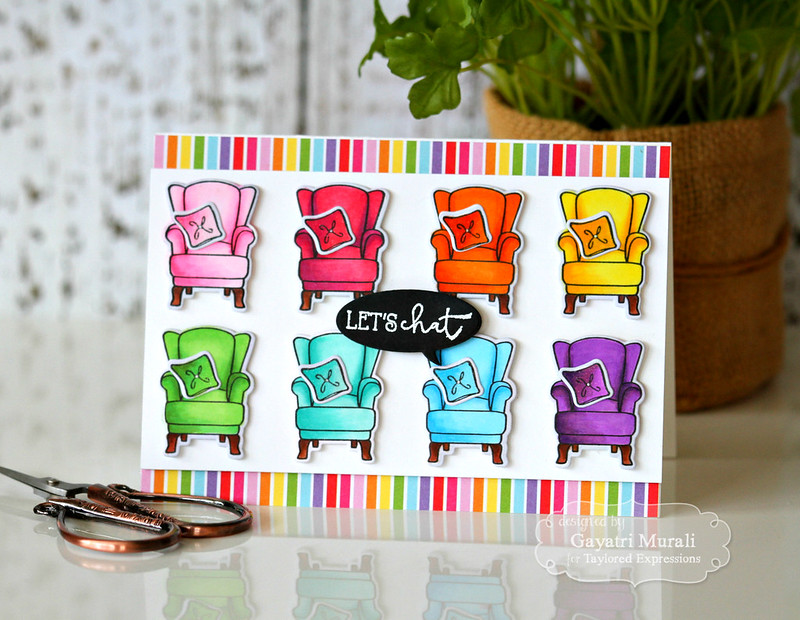
Hello and welcome back! Today I have a rainbow card to share with you. It is project using Taylored Expressions Rainbow Brights pattern paper pack. This card invites all of us to talk about all things important to humanity. From respect and love for each other, to attitude towards each other, to truth and reality, to be able to accept each other irrespective of one’s belief in terms of faith or orientation, to using force and violence, to protecting our planet and animals……. I can go on and on. I believe in knowledge and education is the key. The coloured chairs represent people. We are all different people and we need to chat about living together in peace.  So let’s chat!

Let's Chat card #1//embedr.flickr.com/assets/client-code.js

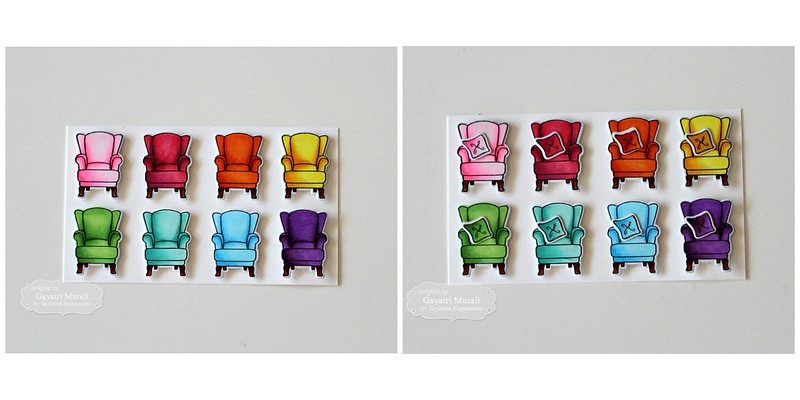
Back to how I made this card, I wanted use the beautiful rainbow striped pattern paper from Rainbow Brights pattern paper pack as an accent on my card. The pattern paper by itself is beautiful but bright and busy, so I used very little of it on my card. But you can see how couple do stripes of the pattern paper makes the colours of the chair pop and brings the card together.  I have a picture tutorial of how I made my card. Sit back and enjoy!

Collage #2
Collage #4
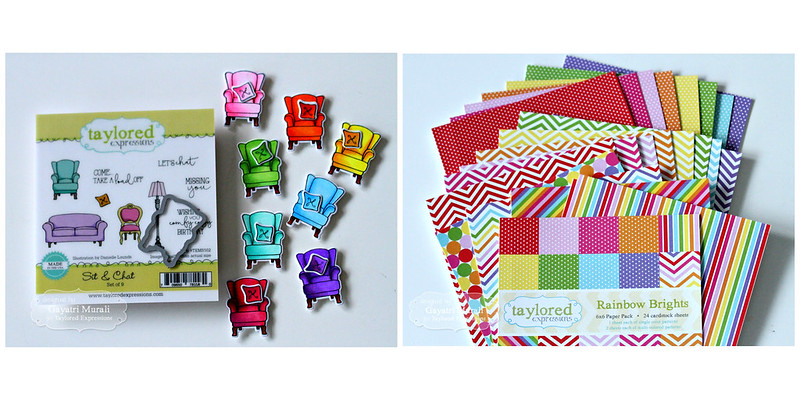
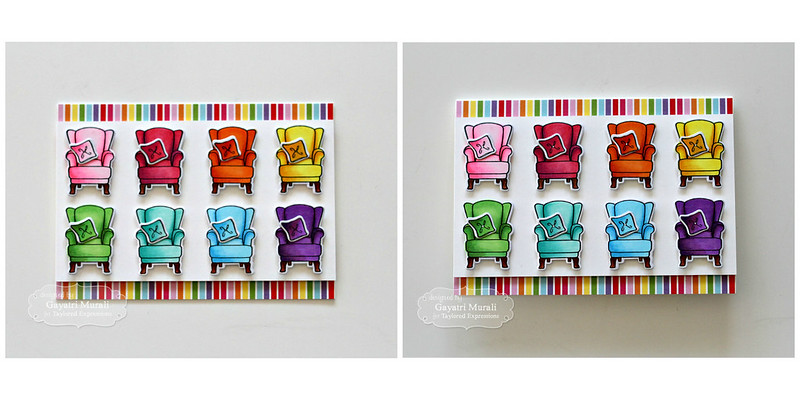
I stamped eight chairs from Sit and Chat stamp set on white cardstock, Coloured them all in rainbow colours using Copic Markers. Did the same with the cushions. I die cut all of them out using coordinating dies.  This card is six by four and half inches. It is not a normal size card because I wanted to showcase all the chairs without over crowding them. I trimmed a white cardstock panel which is six by four inches upon which I foam mounted the chairs and flush glued the cushions on the chairs. On the card front, I adhered two strips of the rainbow striped pattern paper on top and bottom. I love this paper so much that I want to save them, hence I did not glue down the paper on the entire card front. 😉 The strips are good enough. I hoard things I love. Just saying! Then I adhered the chair panel on top of the card front using foam adhesives. Now you can see how the rainbow pattern paper accents the rainbow chairs and makes the colours pop! The sentiment is from the same stamp set white heat embossed on Oreo cardstock and die cut using Say What? Conversation Bubbles die. I think the black speech bubble sentiment ties in with the black outline from the chairs.

Let's Chat card//embedr.flickr.com/assets/client-code.js

//embedr.flickr.com/assets/client-code.js

Hope you like my card and inspiration behind the card.  All the supplies I used to make this card are from Taylored Expressions and are listed below.

Card Supplies:

http://static.inlinkz.com/ppr.js

Thanks for stopping by my blog today. Have a wonderful day!
My blog signature
Taylored Expressions

More Projects from Taylored Expressions June Release!

Hello everyone,
Hope you had a wonderful weekend! Mine was busy on one day and relaxed the other. Not too bad I suppose! This morning during my walk I found dolphins in the river! Absolutely cute. Three of them playing and chasing fishes. They were such a delight to watch. Here are couple of photo if you haven’t already seen them on my FB or Instagram 🙂

But today I am sharing with you couple of more cards I made using Taylored Expressions June release products.
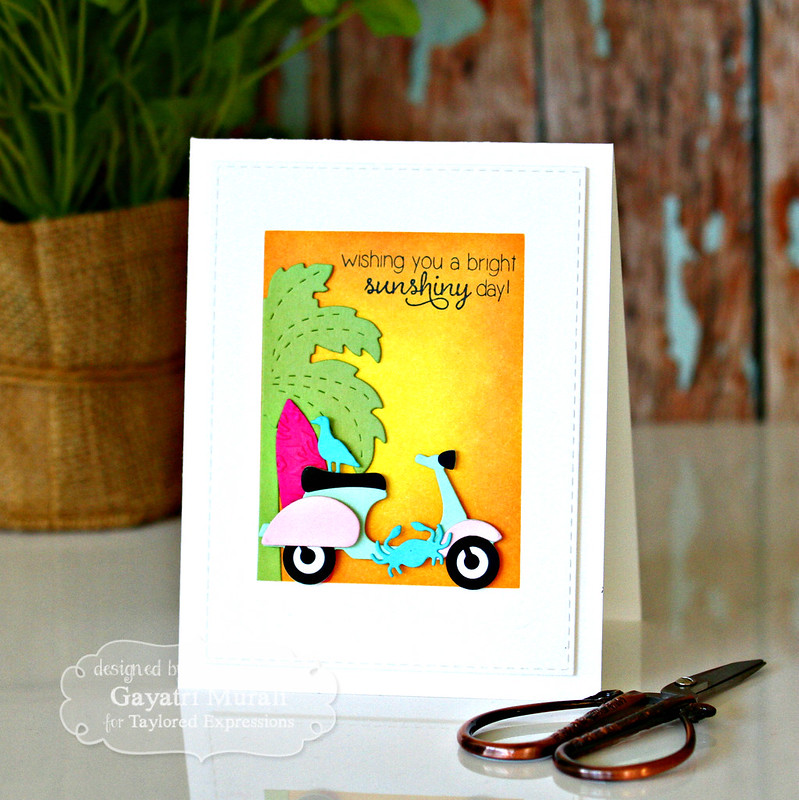
First up is this card I absolutely LOVE. I didn’t plan it to happen this way. I had another idea in mind when I started making this card, but the course changed during the process of making. It turned out better than my original plan. This card uses On the Line Beach Cutting Plate and On the Road Scooter dies to make my card.
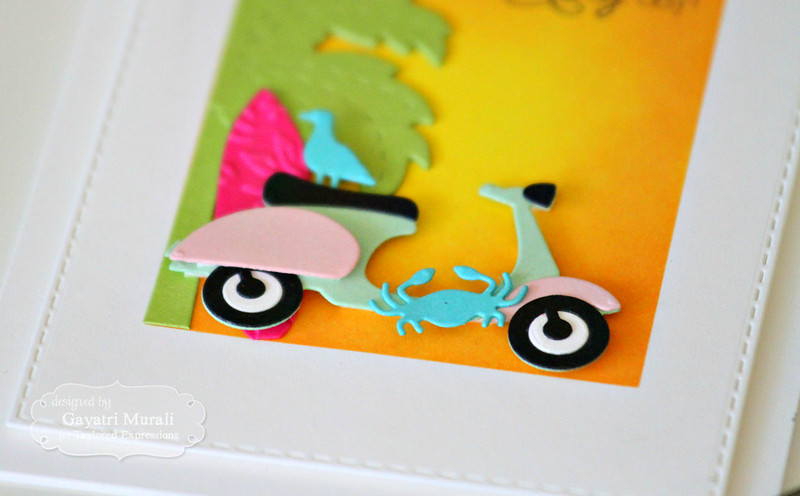
I diecut a stitched rectangle panel using the largest of the Stitched Rectangle Stacklets die set using Sugar Cube cardstock. I masked the edges using one inch masking tape and sponged Lemon Meringue and Candy Corn dye inks from Taylored Expresssions to give the bright sunset background. I then die cut the On the Line Beach tree and its layer using Granny Smith cardstock. I glued the layering piece over the other, trimmed the other tree and bottom of the die cut as I only needed one tree. I adhered is tree to the left edge of the masked area. I die cut the surf board using Lolipop cardstock, ran through Garden Party embossing folder to get dimension and floral pattern on the surf board. I die cut the crab and bird out of Cookie Monster cardstock. The scooter is die cut using Oreo, Sugar Cube, Mint Julep and Cupcake cardstocks and assembled to get the retro look. I then assembled the die cut by layering them next to the tree. Stamped the sentiment from Sunshiny Day stamp set using Oreo Hybrid ink. Here is a closeup!

Card Supplies:

http://static.inlinkz.com/ppr.js

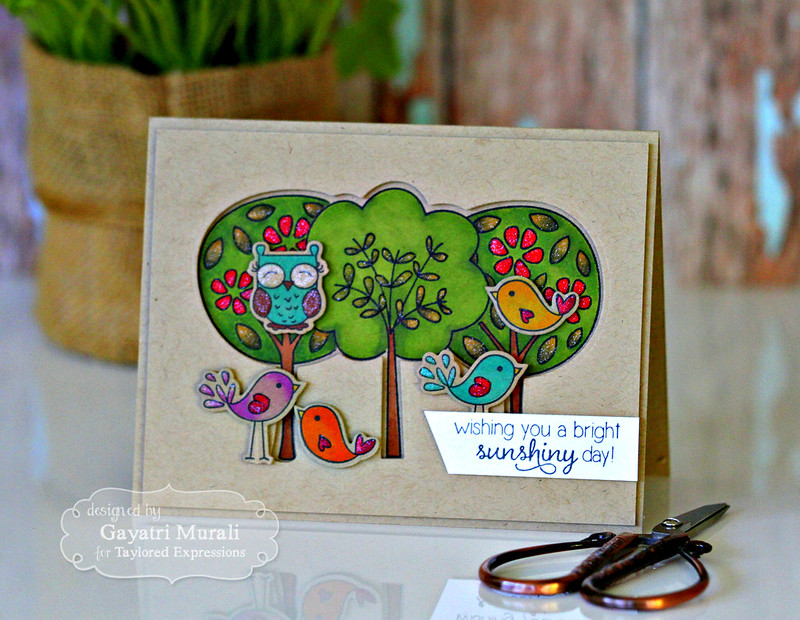
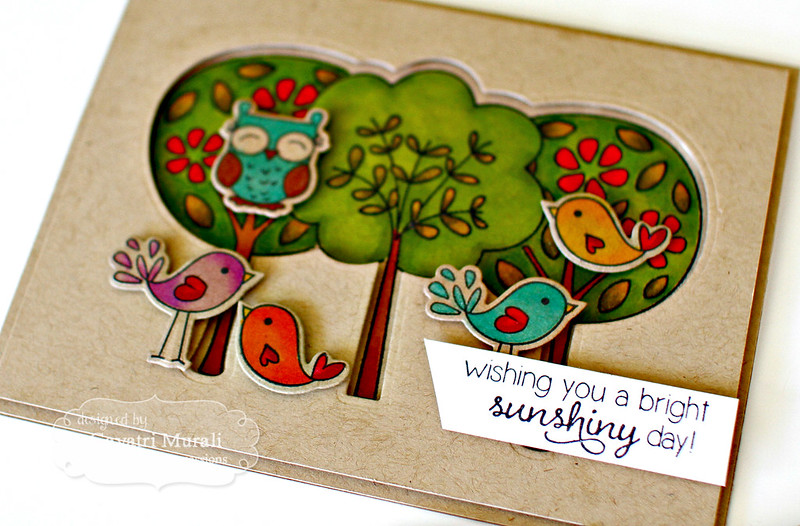
My second card showcases new dies for an older stamp set called Sunshiny Day.

Wishing You a Bright Sunshiny Day by Gayatri Murali//embedr.flickr.com/assets/client-code.js

I LOVE colour on kraft cardstock. Love the muted look of those bright colour. I stamped the birdies from Sunshiny Day stamp set on Toffee cardstock using Oreo Hybrid ink. This ink can be used with copic markers. So I coloured them with copic markers and die cut them out using the new coordinating dies. For the card front, I die cut a Toffee cardstock panel about 1/4 inch smaller than the card base. In the centre of the panel, I die cut the tree dies. I started with the centre tree and then overlapped each side with another tree die. I then adhered the panel on top of the card base temporarily to stamped the images. Again I stamped the centre tree first, then masked the tree to stamp the trees on the sides. I removed the mask and the top panel. Copic coloured the tree images. Adhered the panel back using foam adhesives for dimension. Then all the birdies using the foam adhesives as well. I brushed some shimmer using Wink of Stella clear shimmer pen on certain areas. The sentiment is stamped on a strip of Sugar Cube cardstock.
Wishing you a bright sunshiny day #3 by Gayatri Murali//embedr.flickr.com/assets/client-code.js

//embedr.flickr.com/assets/client-code.js
Card Supplies:

http://static.inlinkz.com/ppr.js
 
Hope you like my cards. For more inspiration check out Taylored Expressions Gallery.

Thanks for stopping by my blog today!

My blog signature
Taylored Expressions

You’re Sweet! Taylored Expressions Release Day!

Hiya everyone, It is the release day at Taylored Expressions. Yay! All the new goodies I showcased over the past three days are released today. You will love the new stamp sets, dies and embossing folders. They are gorgeous and summery.
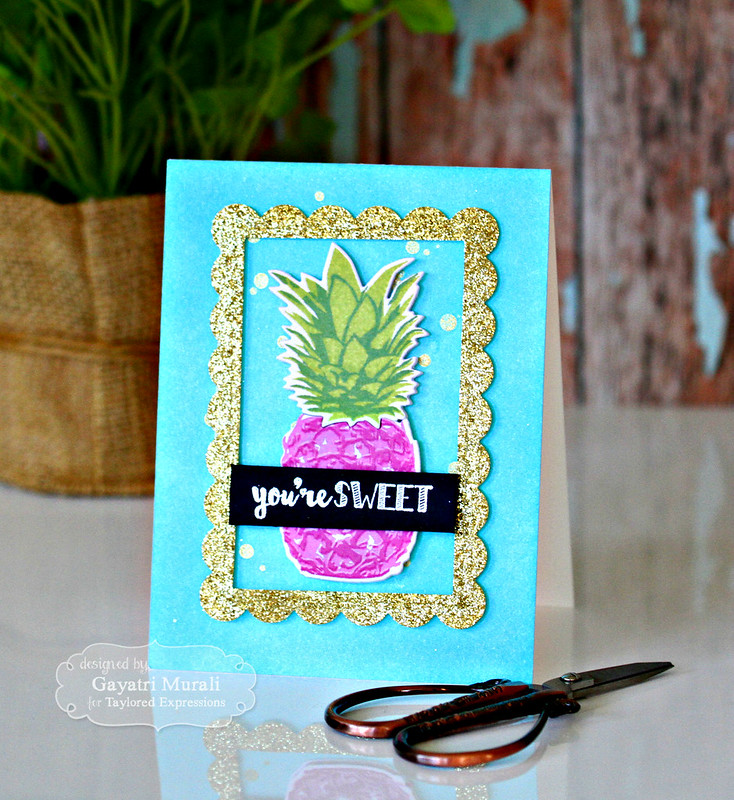
I am showcasing a stamp set and coordinating die called Simply Stamped Pineapple. You have seen sneak peek of the pineapple on my gold foil card on day #2. This is a layering stamp set and has coordinating dies for it. Woohoo! Love pineapples and coordinating dies too. So I ahve two cards to share with you.
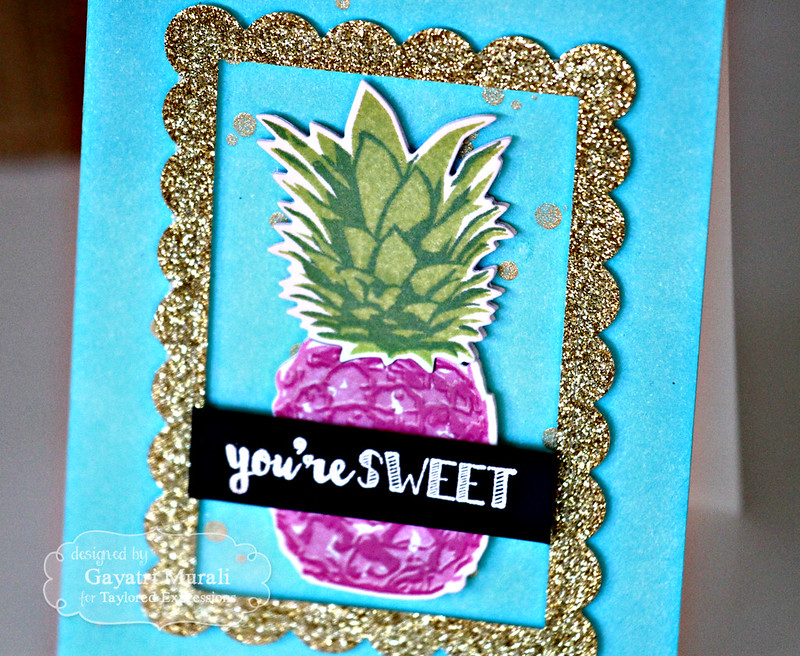
One my first card, I have stamped layered the pineapple and used it as a focal point. This card is more stylised and hence the pineapple is not in its original colours.
I sponged the background of the card with Cookie Monster dye ink and spattered gold color shine. Then stamped the pineapple using Strawberry Milkshake and Lollipop dye ink. I need three shades of pink but I had only two colours. So after stamping the second layer in Lollipop ink, I stamped the second layer again in White pigment ink. This gave me the third medium pink colour. The last layer is stamped with Lollipop dye ink. For the leaves, the base layer with Granny Smith and shading layer with Peapod. The leaves have two layers only. I die cut them out and a few more using white cardstock. I layered glued them with the stamped pineapple on the top to give added dimension. I adhered this on the centre of the card front. I framed the pineapple with gold glitter scalloped frame die cut using Frame in Frame 2 die set. The sentiment is white heat embossed on Oreo cardstock.

You're Sweet card closeup by Gayatri Murali//embedr.flickr.com/assets/client-code.js
Card Supplies:

http://static.inlinkz.com/ppr.js

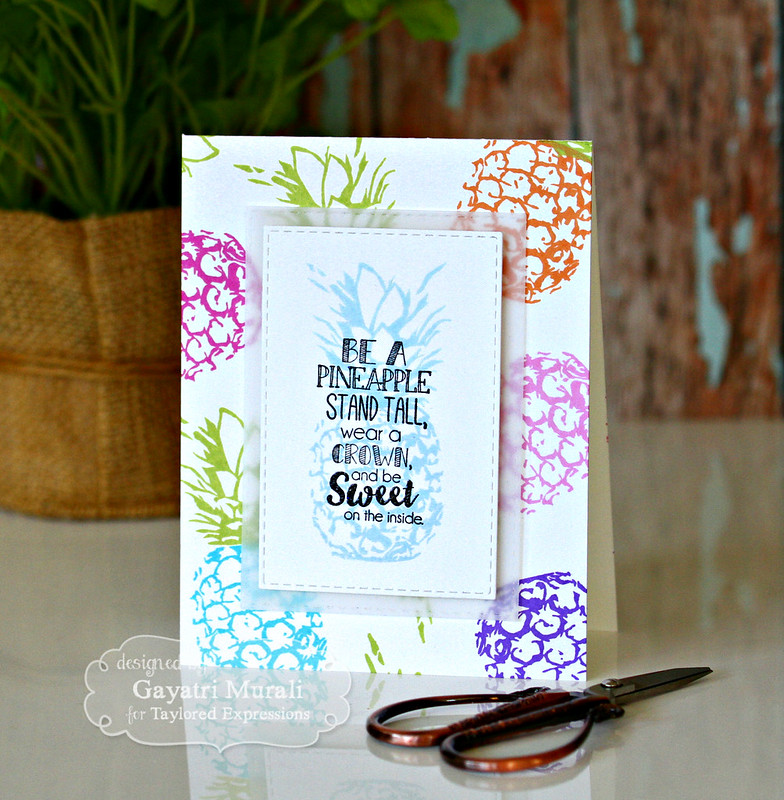
For my second card, I used the pineapple stamp for my background and highlight the beautiful sentiment from the stamp set on the card.

Stand Tall Pineapple card by Gayatri Murali//embedr.flickr.com/assets/client-code.js
 I used the third shading layer of the pineapple and the second shading layer of the leaves with various colours of dye ink from Taylored Expressions to create my background. Then I die cut a layer of vellum and a smaller layer of Sugar Cube cardstock using Stitched Rectangle Stacklets. On the white panel, I stamped the pineapple using Salt Water Taffy and the beautiful sentiment from the stamp set in Versamark and Oreo hybrid ink and clear heat embossed. This panel is layered with vellum panel and adhered on the card front using foam adhesives. Simple, colourful and stylish. I LOVE that sentiment.

Card Supplies:

http://static.inlinkz.com/ppr.js
All the new goodies are available at Taylored Expressions store for purchase now. Please visit Taylored Expressions Blog for more inspirations from designers.
Happy Shopping!

My blog signature