Winnie & Walter.

Winnie & Walter Release Premiere Day #1

Hello and welcome to Day #1 of Winnie & Walter New Release.

There are nine stamp sets, quite a few cutaways released on February 3rd including a free stamp set.

Today I am showcasing a stamp set from Winnie & Walter’s trademark The Big and Bold series called The Big, the Bold and Baby! 

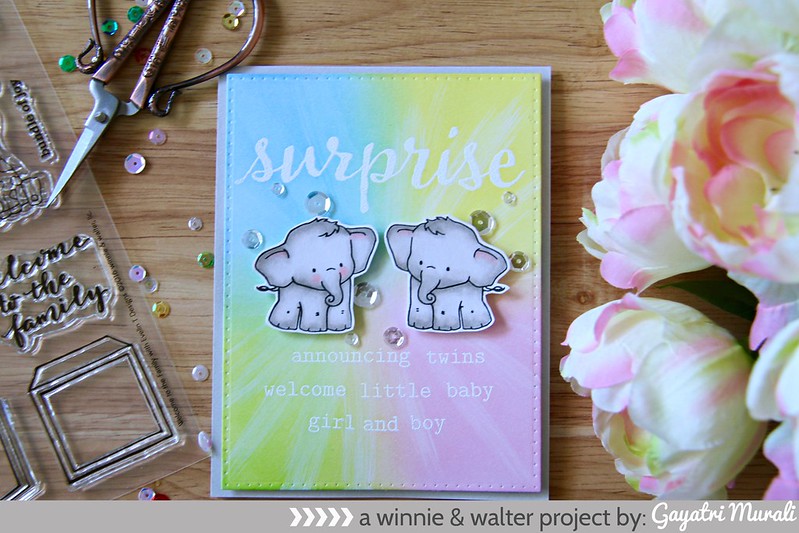
This stamp set is a big 6×8 inch stamp set and there are dies available for this set separately. I don’t have the dies with me so I have used only the stamp set to make my card.  There is a sneak peek of another new stamp set on my card.

Surprise card//embedr.flickr.com/assets/client-code.js


Instructions:

1. Fog cardstock is my card base.

2. I die cut a white cardstock using the largest rectangle die from Essentials: Katharine Cutaway.

3. Sponged distress inks Twisted Citron, Spun Sugar, Squeezed Marmalade and Tumbled Glass.

4. Once dry, I used Picket Fence distress paint to make some rays starting  from centre of the panel to the edges and let it dry.

5. I stamped the cute elephant images from another new stamp set to be previewed later during the week and copic coloured both the images. I then hand cut them out. There are coordinating dies available for it. I just don’t have them with me yet.

6. The sentiments from The Big, the Bold and Baby stamp set are white heat embossed on the top and bottom of the panel.

7. I adhered the elephants using foam adhesives on the middle of the panel.

8. This panel is adhered on the card base using foam adhesives and embellished using Sparkling Clear sequins.


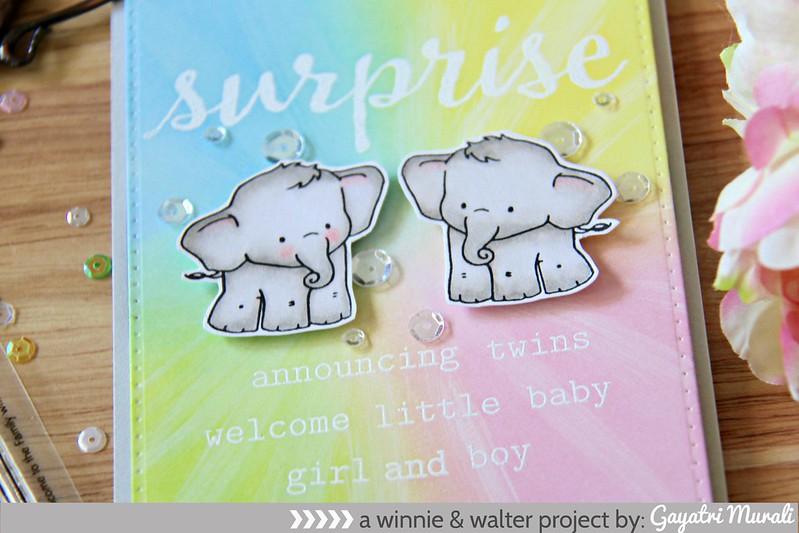
Here is a closeup of the card.

Surprise card clsoeup1//embedr.flickr.com/assets/client-code.js

Love the sentiments on the The Big, the Bold and Baby. There are so many sentiment to make baby cards for baby boy, baby girl and twins. And there are images from other new stamp sets which will go well with the stamp set.

Check out Winnie & Walter Blog for more inspirations from the Design Team and more details about the Big Giveaway.

Thanks for stopping by my blog today. I will see you tomorrow with Day #2 of Winnie & Walter new release.

My blog signature
Uncategorized

Simon Says Anything Goes!

Hi all and welcome to another week on the Simon Says Stamp Wednesday Challenge
Thank you for joining us for the Anything But A Card Challenge and we hope you will all join us again this week too.
We will be back soon with the name of the lucky winner of the $50 Voucher
This week the challenge is

Anything Goes

This week we are showcasing Carabelle Studio Products. You don’t have to use them for the challenge but if you have them we would love to see them used.
As always Simon Says Stamp will be giving away $50 voucher to shop at the fabulous Simon Says Stamp Store.
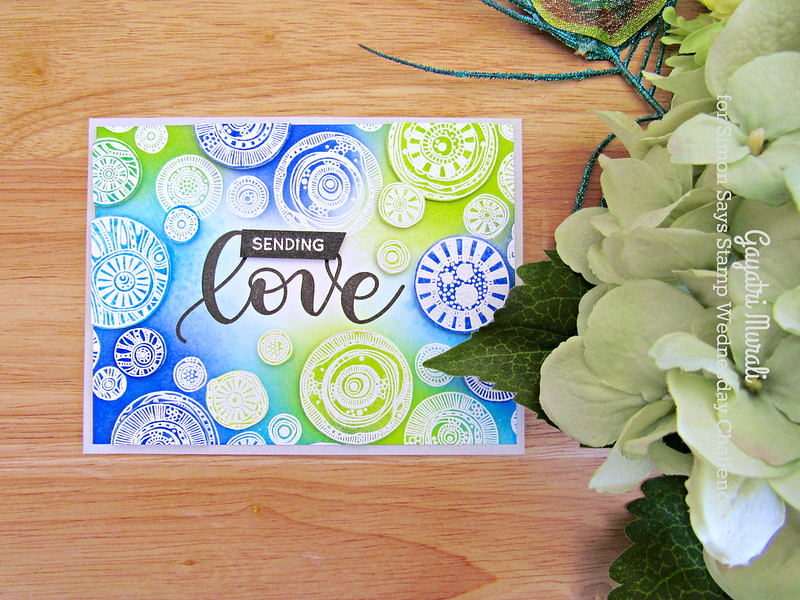
I have used Carabelle Studio’s ET RONDS stamp set to make my card.
Sending Love
Instructions:

1. I started with a white cardstock panel which measured 4.25″x5.50″.
2. I white heat embossed the images from Carabelle Studio on the edges of the card panel.
3. I trimmed the panel to 4″x5.25″ in size and them sponged Blueprint Sketch, Twisted Citron and Salty Ocean distress inks on the edges fading to the middle.
4. I also white heat embossed the images on a scrap piece of cardstock and sponged the same distress inks.
5. I fuzzy cut the images from the scrap piece of paper to over lay on the main panel.
6. Before that I stamped the large sentiment from Simon Says Stamp Love stamp set using Versafine Black Onyx ink. I used mini MISTI to stamp the sentiment in middle of the panel and get good coverage.
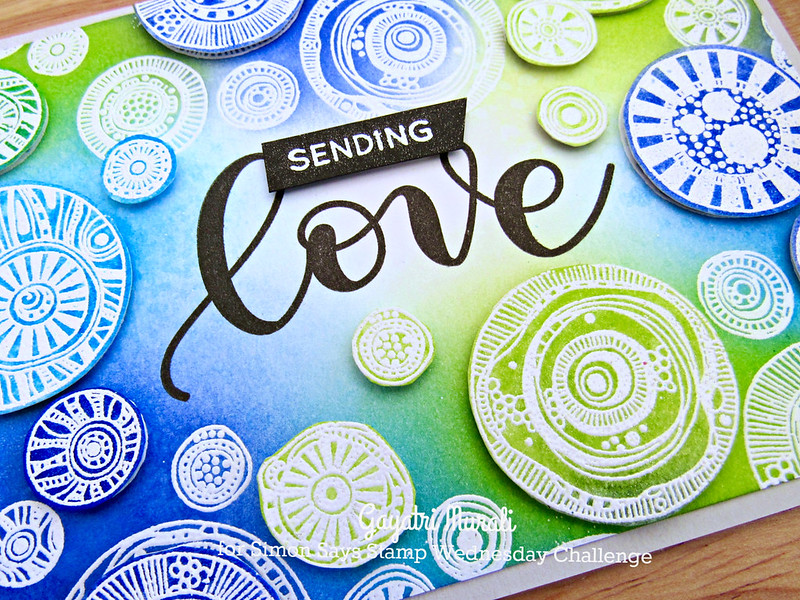
7. I now over laid the cut images on the main panel using foam adhesive to add dimension.
8. The smaller sentiment is white heat embossed on black cardstock, trimmed and adhered using foam adhesives as well.
9. Final panel is adhered on Fog card base.
Here is a closeup of the dimension.
So now it’s YOUR turn to get crafty!!
Do you use Instagram ?  If so please add  #ssswchallenge to your challenge entry uploads so we can see them on there too !
There are fabulous Give Aways and inspiration from fabulous designers on a daily basis over on the Simon Says Stamp Blog , if you haven’t subscribed by email you may want to so you don’t miss out.
Simon Says Stamp
You have until Wed  8am Ohio time. 1pm UK time, 2 pm CET to join in
No backlinking allowed, Only 5 new creations will be eligible in the prize draw
word-verif
Card Supplies:

https://static.inlinkz.com/ppr.js

Thanks for stopping by my blog today!
My blog signature
Taylored Expressions, Valentine's day cards

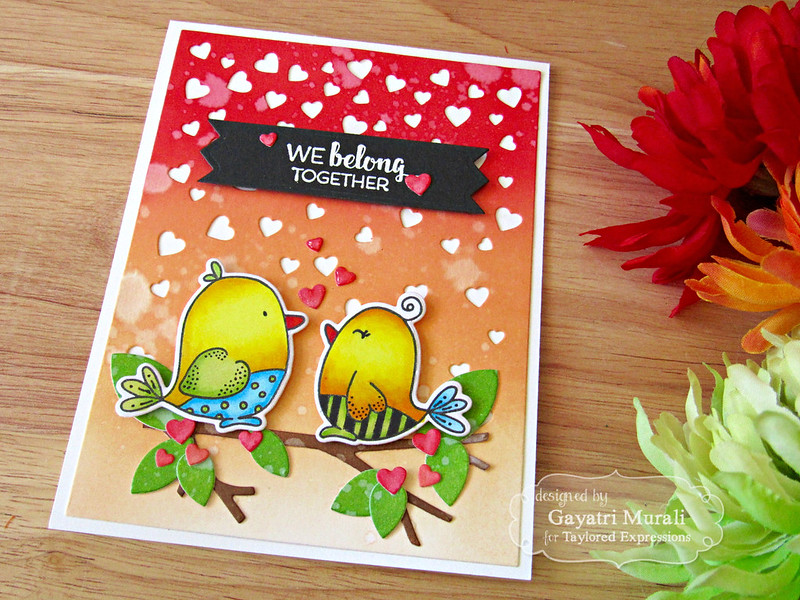
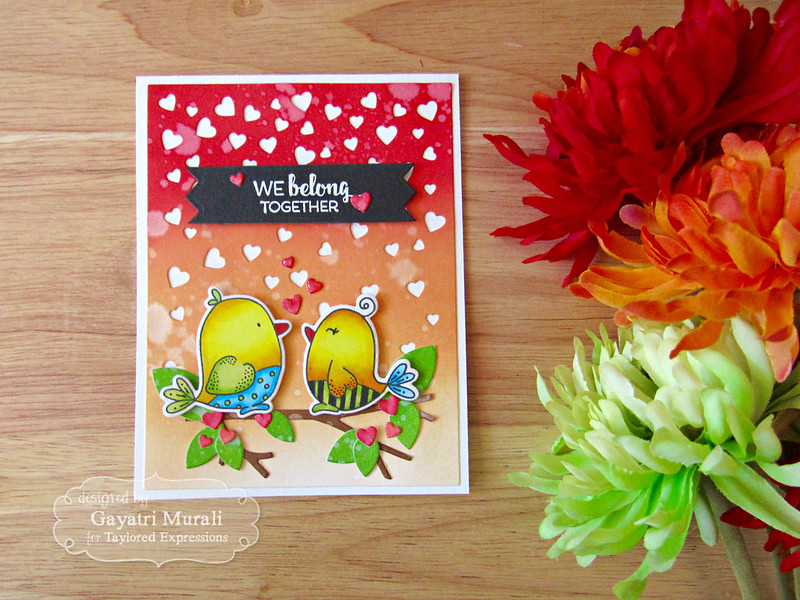
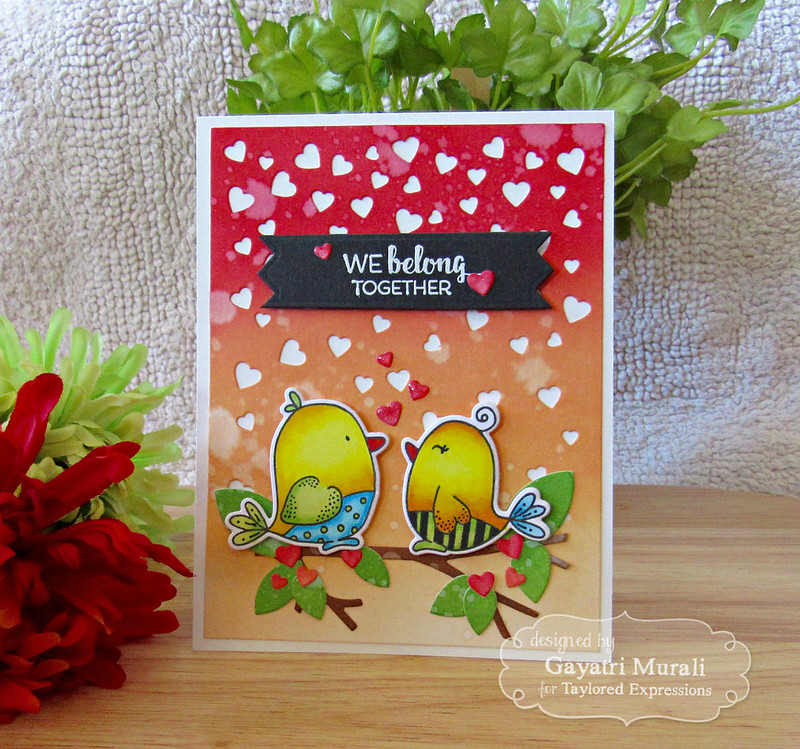
We belong together!

We belong together flat closeup

Hello everyone,

I am back sharing a card I made using Taylored Expressions stamp sets and dies. These products were released in December 2016 and are valentine themed. 
Instructions:

1. Blend Candied Apple and Dried Marigold distress inks on Sugar Cube cardstock panel.
2. Spatter clean water to add texture to the panel.
3. Die cut this panel using Falling Heart cutting plate from Taylored Expressions and adhere on Sugar Cube card base.
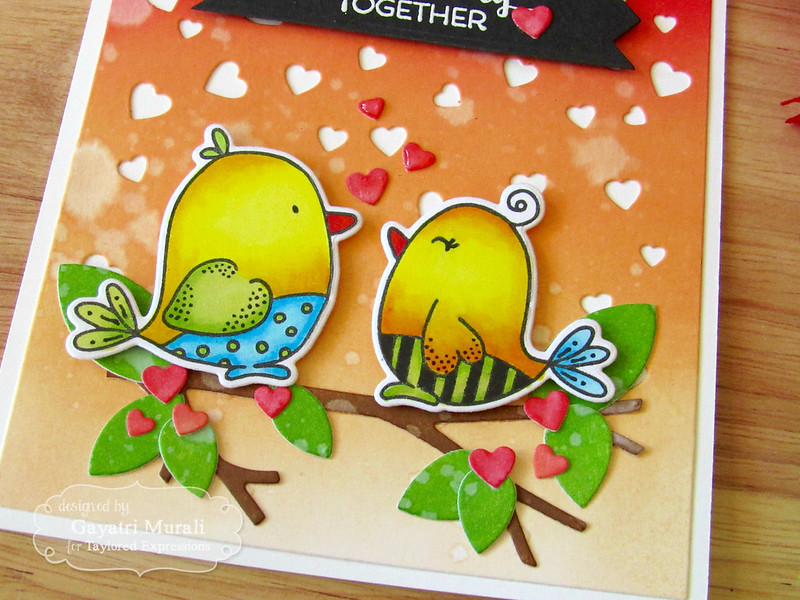
4. Stamp the bird images from The Birds and the Bees stamp set from Taylored Expressions using Oreo hybrid ink.
5. Coloured them using copic markers and die cut them using the coordinating dies.
6. Sponge Gathered Twigs and Mowed Lawn distress inks on a scrap piece of white cardstock and spatter with clean water.
7. Die cut the branch and leaves using On the Limb – Branches and On the Limb – Leaves dies also from Taylored Expressions.
8. I adhered the leaves on the branches and adhered on the bottom of the panel.
9. I adhered the birds on the branches using foam adhesives for added dimension.
10. I white heat embossed the sentiment from The Birds and the Bees on Oreo cardstock and die cut using the second smallest die from Banner Stacklets 4.
11. I adhered this on the top middle of the card front using foam adhesives.
12. I used the tiny hearts left over from die cutting the sponged panel to embellished the card. I brushed the heart with Wink of Stella clear shimmer and added glossy accent on the heart above the birds only.

Some more photos of the card for you.

We belong together closeup1//embedr.flickr.com/assets/client-code.js

We belong together//embedr.flickr.com/assets/client-code.js

The supplies used to make my card is listed below.

Card Supplies:

https://static.inlinkz.com/ppr.js

Thanks for stopping by my blog today!

My blog signature

Uncategorized

Simon Says Anything But a Card!

Hi all and welcome to another week on the Simon Says Stamp Wednesday Challenge
Thank you for joining us for the Winter Birthday Challenge and we hope you will all join us again this week too.
We will be back soon with the name of the lucky winner of the $50 Voucher
This week the challenge is

Anything But A Card


This week we are showcasing We R Memory Keepers Products. You don’t have to use them for the challenge but if you have them we would love to see them used.
As always Simon Says Stamp will be giving away $50 voucher to shop at the fabulous Simon Says Stamp Store.
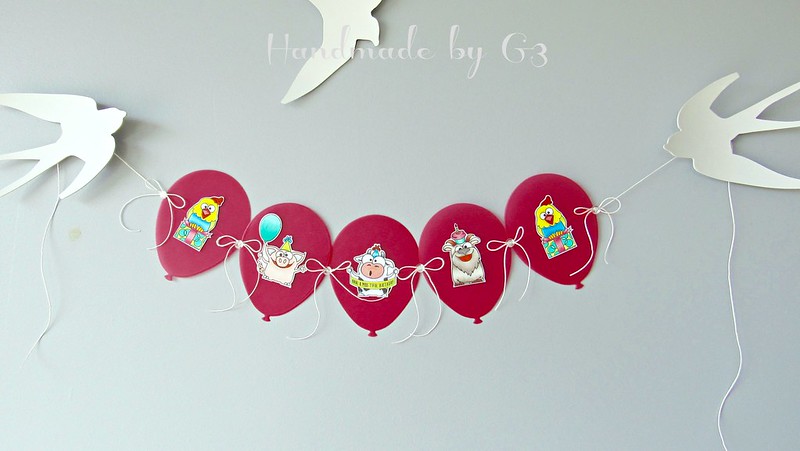
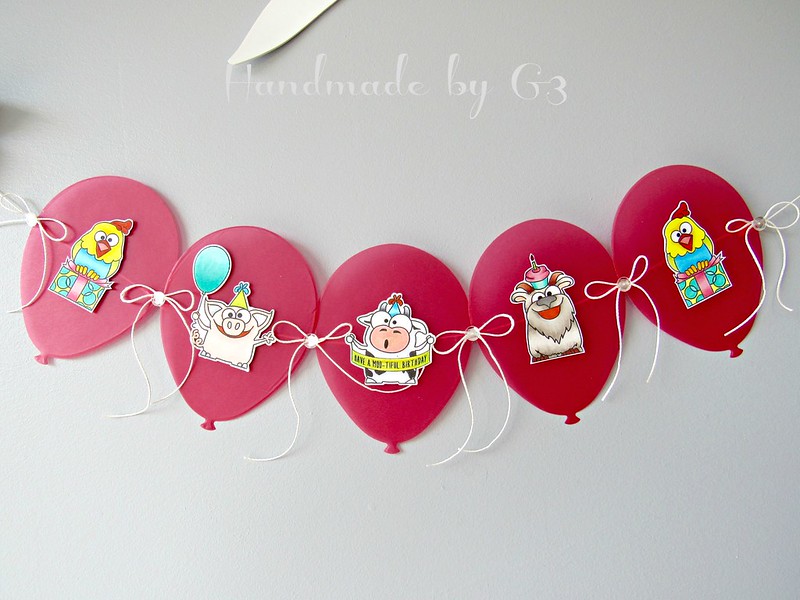
I used We R Memory Keepers’s DIY Party Vellum Pad to make my birthday banner.
I used the red vellum paper and Simon Says Stamp Balloons die to die cut five red vellum balloons which forms the base for the banner. To dress it up, I used Simon Says Stamp’s Birthday Farm Animals stamp set. I stamped the animal images and copic coloured them. There are coordinating die set has dies for two of the images. So I used those dies to die cut two of the images and hand cut the rest of the images. I adhered them on the balloons using foam adhesives. I ran a thread behind the balloons to make them a banners. Then added bow made out of the same thread between two balloons and at the ends of the balloons. Here is a closeup of the banner.

Banner closeup//embedr.flickr.com/assets/client-code.js 

Simple, easy and love the coloured vellum. Perfect for little kids birthday party. The Balloon dies have smaller balloon die which can be used as cupcake toppers and decorate the party bag. Cool huh! So now it’s YOUR turn.  Happy Crafting!
Do you use Instagram ?  If so please add  #ssswchallenge to your challenge entry uploads so we can see them on there too !
There are fabulous Give Aways and inspiration from fabulous designers on a daily basis over on the Simon Says Stamp Blog , if you haven’t subscribed by email you may want to so you don’t miss out.
Simon Says Stamp
You have until Wed  8am Ohio time. 1pm UK time, 2 pm CET to join in
No backlinking allowed, Only 5 new creations will be eligible in the prize draw
Card Supplies:

https://static.inlinkz.com/ppr.js

Thanks for stopping by my blog today.
My blog signature
Watercolour Panel

You’re simply the Best!

Hello and welcome back!

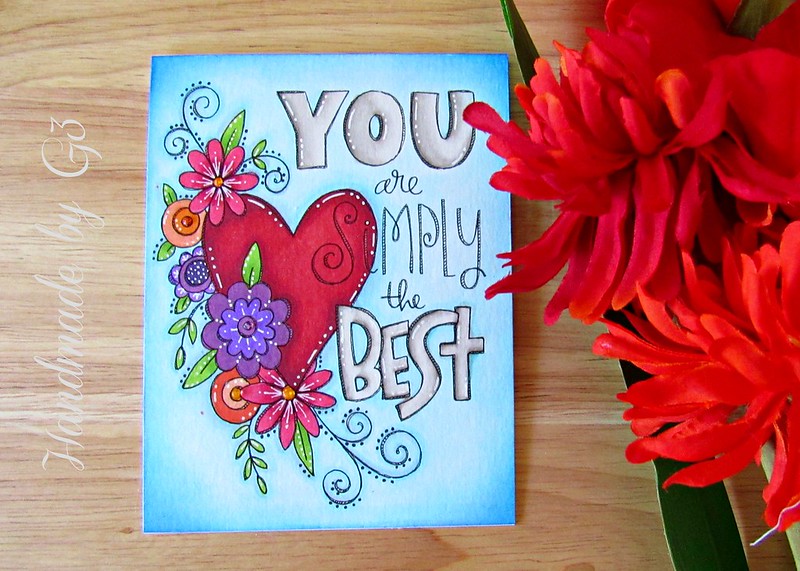
This is my first post for 2017. By that I mean the first card I made in the new year and the first post I wrote in the new year. After a vacation break, I am find it difficult to get back into crafting. No mojo to make anything. I tried organising, surfing blogs for inspirations, watching videos but meh! Nothing worked. Getting a bit frustrated. So yesterday I forced myself to sit at my craft desk and make some thing. After rejecting a few ideas which required patience and precision, I picked Simon Says Stamp’s Take My Heart watercolor panel from Hey Love collection to colour. That will be easy to make a start, right? Yes, it was easy as I only had to colour and I did! Only that I coloured the watercolour panel using copic markers instead of watercolours!!! I only realised after colouring couple of images on the panel. Anyway, what the heck, I continued to colour with copics and made a card. Hooray! The end result was what I wanted to achieve. Make something and get crafting. So here is to a great start to the new year!

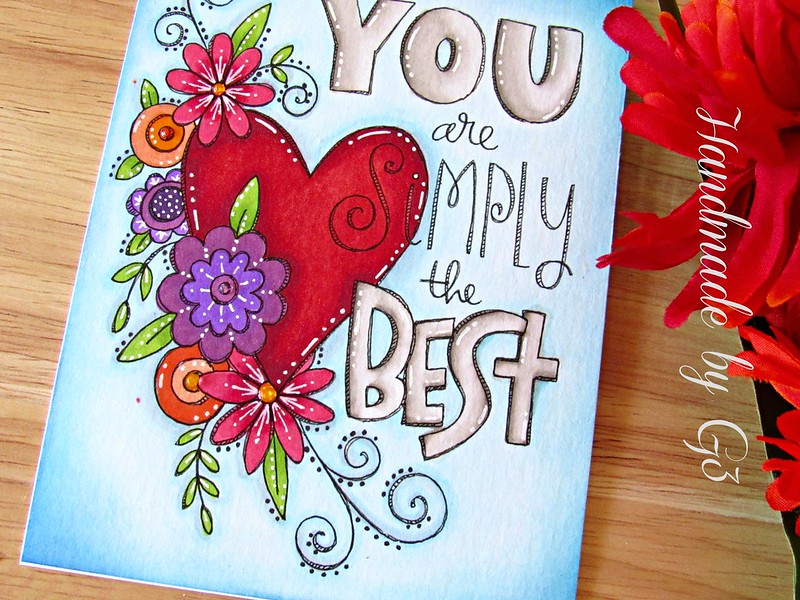
After colouring the panel, I used Sakura White and Black Gelly Roll pens to add details to the design. Although, I coloured the background using copic marker, I still felt the edges need darker shade to frame the design on the panel. I used Mermaid Lagoon and Blueprint Sketch distress inks to sponged the edges of the panel. To get some texture I added glossy accent to the centre of the flowers. The panel is adhered on a white card base. Here is a closeup of the card.

Watercolour panel closeup//embedr.flickr.com/assets/client-code.js

You can find the Take My Heart watercolour panels from Hey Love collection at Simon Says Stamp store. Hoping this will bring back my mojo and be able to share more inspirations for you this year.

Card Supplies:

Thanks for stopping by my blog today.

My blog signature

Taylored Expressions

Hello! It is all rainbows and unicorns!

Welcome back and it is the release day of Taylored Expressions January release. Hooray! It is time to get that wish list and shop the new release products. Today I am showcasing two more products.
The first one is called Dreamer Stamp and Die combo set
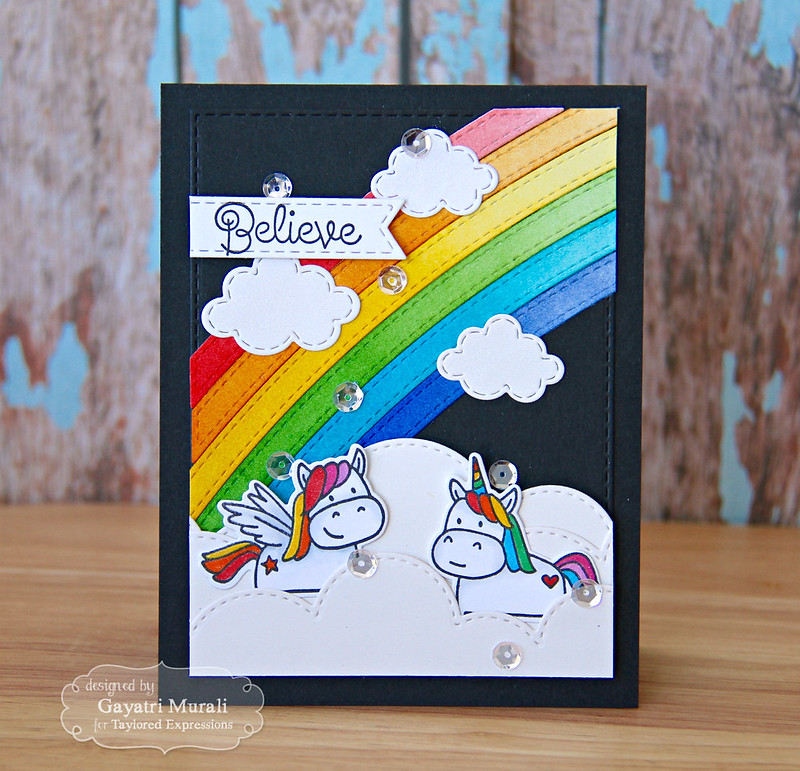
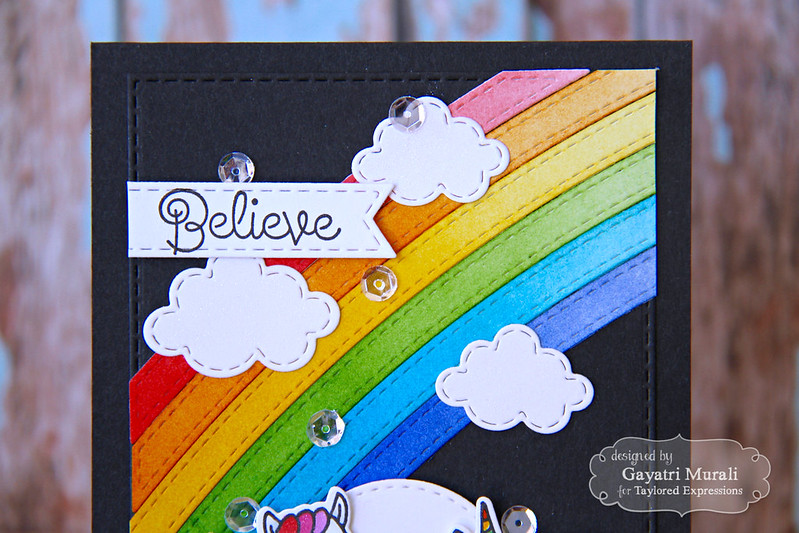
Totally adorable unicorns and I combined this with Rainbow Cutting Plate to make my card.
I stamped, coloured and die cut the unicorns. I used rainbow colours to colour because I am adding rainbows to the card. I die cut the rainbows using the Rainbow Cutting Plate. I am only using the strips of rainbow die cuts and not the entire cutting plate. I sponged distress inks in rainbow colours on ombre fashion on the strips. I also die cut two Rolling Hills and Stitched Cloud Duo using Buttercream Frost cardstock. The base panel is die cut using Oreo cardstock using the Stitched Rectangle Stacket die.
GAYATRIDreamercloseup1THURS//embedr.flickr.com/assets/client-code.js
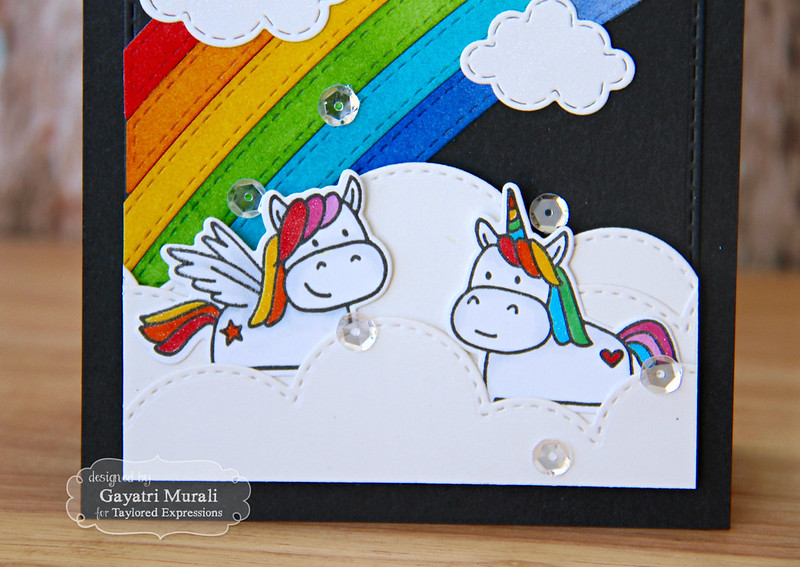
GAYATRIDreamercloseupTHURS//embedr.flickr.com/assets/client-code.js

To assemble the card, I adhered the rainbow strips at an angle and trimmed the excess off. Then the rolling clouds is adhered on the bottom of the panel. The first two are flush adhered and the last one is foam adhered. I tucked the Unicorns behind the first clouds. Then added the Stitched Clouds. The sentiment also from Dreamers stamp and die combo is stamped using Oreo hybrid ink and die cut using the smallest Stitched Banner die from Stitched Banner Stackets. Finally embellished with some sparkly sequins from TE sequins collections. I have listed all the supplies used to make this card below.

Card Supplies

https://static.inlinkz.com/ppr.js

The second product I am showcasing today is the new Kaleidoscope embossing folder.

I did some masking to highlight the beautiful patterns on the embossing folder on my card.
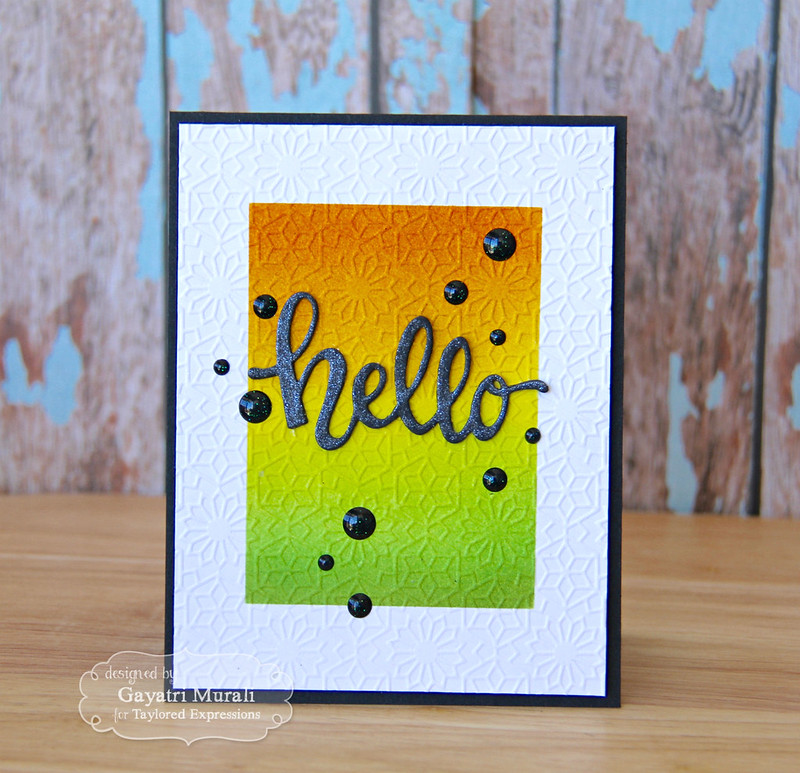
GAYATRIKaleidoscopeefTHURS//embedr.flickr.com/assets/client-code.js

I trimmed a Sugar Cube panel and masked about an inch around the perimeter of the panel then sponged distress inks Dried Marigold, Spiced Marmalade, Mustard Seed, Twisted Citron, Mowed Lawn and Peeled Paint. I removed the mask and ran the panel using the Kaliedoscope embossing folder. Love the pattern on the highlighted area of the panel. I adhered this panel on Oreo card base using foam adhesives. Then for the sentiment I die cut five Hello Script die, stacked and glued on top of each other, then brushed the top die cut with Wink of Stella clear shimmer. I adhered this sentiment on the top centre of the panel. Accented with Beetle enamel dots from Doodlebug.
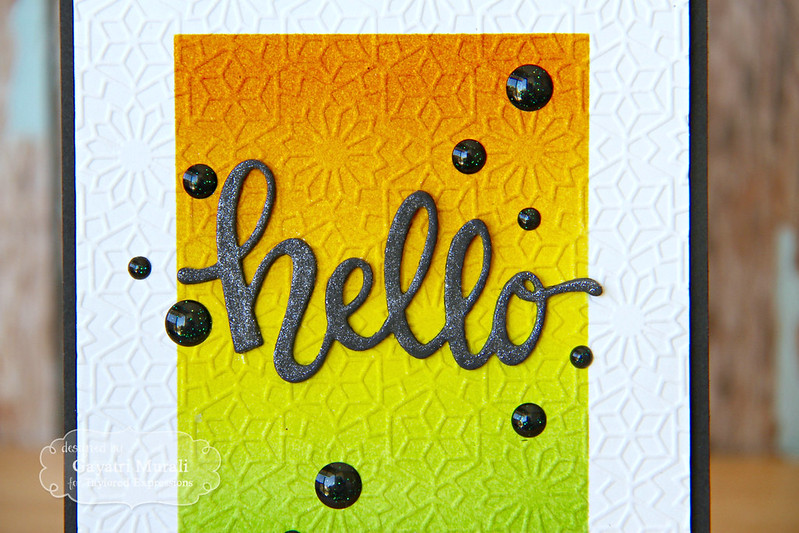
GAYATRIKaleidoscopecloseupTHURS//embedr.flickr.com/assets/client-code.js

All the supplies I used to make this card is listed below.

Card Supplies:

https://static.inlinkz.com/ppr.js

Hope you enjoyed all the new projects from this release. Hope you like all my projects this release. All the new goodies from the release can be found at Taylored Expressions store.

Thanks for stopping by today. Happy Shopping!

My blog signature
Taylored Expressions

It’s a Sign, So Let’s talk!

Welcome back once again. Today is day #3 of Taylored Expression January release sneak peek. And I am sharing two more cards using two more new products to be released on Thursday. The first product I am showcasing is a stamp set called Give Me A  Sign! 
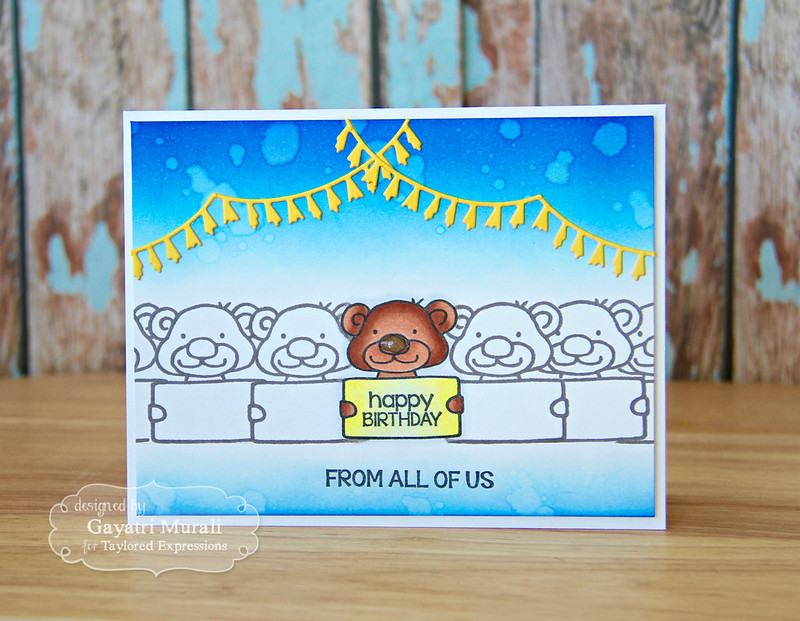
How cute are these animals holding the sign board? All the variety of sentiments that fit in the sign board. Absolutely adorable set. I am showcasing the bear image from the stamp set.
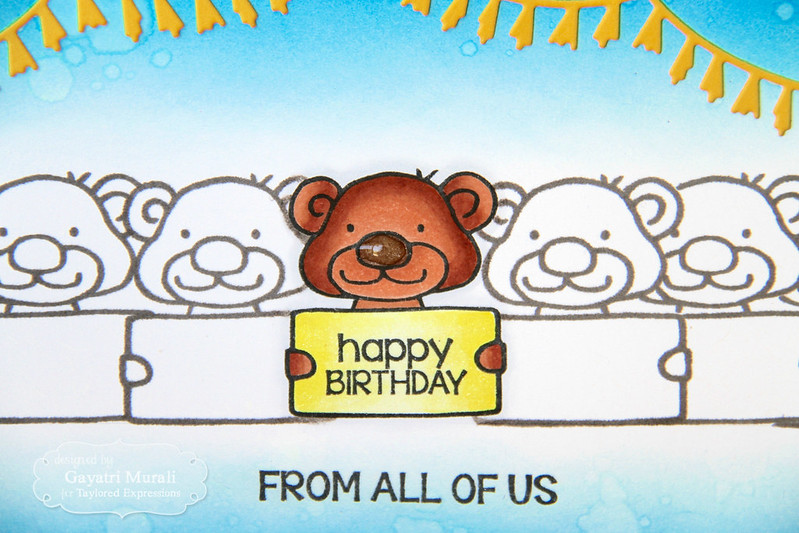
I did masking technique to stamp a series of bear image holding the sign board. The image that is in the front is stamped first using Oreo hybrid ink. Then masked the main image to stamp the images beside using Earl Grey dye ink. I repeated the process till the end of the panel. I highlighted the centre main image by colouring with copics. I stamped the Happy Birthday sentiment inside the sign board and the secondary image below the images using Oreo hybrid ink.

GAYATRIGivemeasigncloseupWED//embedr.flickr.com/assets/client-code.js

To celebrate the sentiment I sponged distress inks Salty Ocean, Mermaid Lagoon and Blueprint Sketch on top and bottom of the panel. I added water to get spatter texture on the ink. Then I die cut a  Banner die from Skinny Party Border die using Lemon Meringue cardstock to add to the top of the panel. I adhered this panel on a white card base and added glossy accent on the nose of the bear.

Card Supplies:

https://static.inlinkz.com/ppr.js

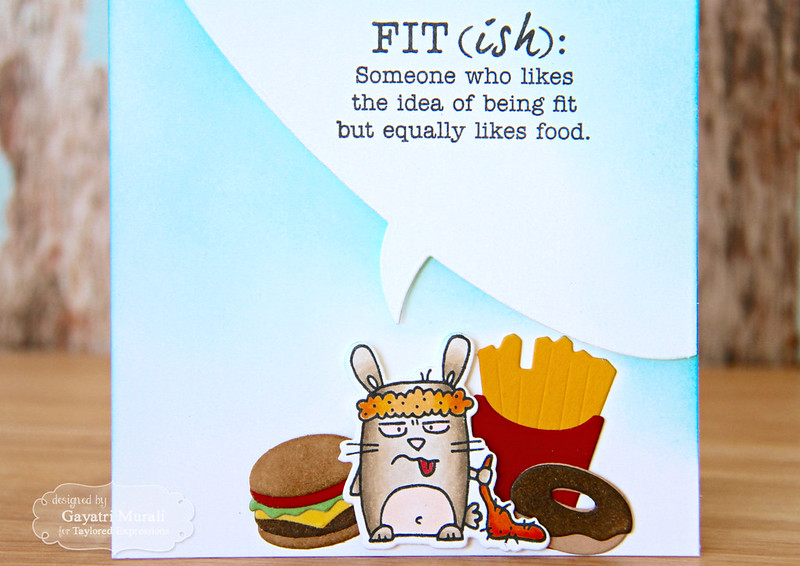
The second product I am showcasing today is a die called Let’s Talk Edger 3 die. There is already a Let’s Talk Edger 1 and 2 die released last year. This one is the third in the series as it says in the name.

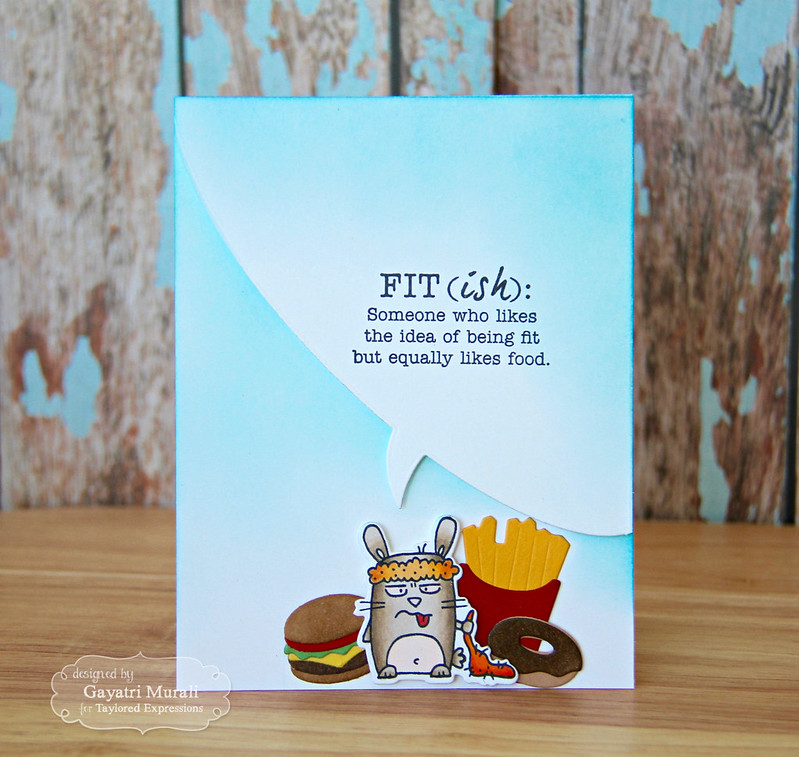
I combined the Let’s Talk Edger 3 die with the new Exercise Grumplings stamp set to make this card. And it is my favourite card in this release.

GAYATRILetstalkedger3WED//embedr.flickr.com/assets/client-code.js

I used the Let’s Talk Edger 3 die at an angle with the sentiment from Exercise Grumplings stamp set. To highlight the sentiment I sponged Peacock Feathers distress inks. This sentiment is fantastic. Gave me the giggle as I can totally relate to it.

GAYATRILetstalkedger3closeupWED//embedr.flickr.com/assets/client-code.js

The focal point has one of the Exercise Grumpling image stamped, copic coloured and die cut using the coordinating die. I combined this image with Little Bits: Donuts, Little Bits: Hamburger and Little Bits: French Fries. I thought they were perfect together for the sentiment. LOVE how this card turned out. The Let’s Talk Edger 3 die is perfect for this card.

Card Supplies:

https://static.inlinkz.com/ppr.js

For a limited time, earn DOUBLE CRAFTY POINTS on our Exercise Grumplings Bundle! If you’re not a Crafty Points member, it’s free and easy to join. Just create an account at the TE webstore and you’re automatically enrolled to begin earning crafty points with every purchase. You’ll earn 82 Crafty Points on the purchase of the Exercise Grumplings Stamp Set and Coordinating Dies Bundle!

Offer valid on qualifying purchases made between 7am PST on Thursday, January 12 and 11:59 pm CST on Sunday, January 15, 2016 and only while supplies last. Crafty Points are only available on purchases made via our retail webstore, www.tayloredexpressions.com.

Taylored Expressions is celebrating Release Week with some fabulous giveaways! Visit Taylored Expressions Blog to answer Taylor’s Question of the Day for a chance to win a prize from the latest release!

While you are there, check out gorgeous inspirations from the rest of the designers using the sneak peek products. Tomorrow is the release day! See you with more TE projects.

Thanks for visiting my blog!

My blog signature

Lawn Fawn

Simon Says Winter Birthday

wed-newchallenge-header

Hi all and welcome to another week on the Simon Says Stamp Wednesday Challenge
Thank you for joining us for the New Something Challenge and we hope you will all join us again this week too.
We will be back soon with the name of the lucky winner of the $50 Voucher
This week the challenge is

Winter Birthday

This week we are showcasing Lawn Fawn Products. You don’t have to use them for the challenge but if you have them we would love to see them used.
As always Simon Says Stamp will be giving away $50 voucher to shop at the fabulous Simon Says Stamp Store
50dollar_voucher_600px

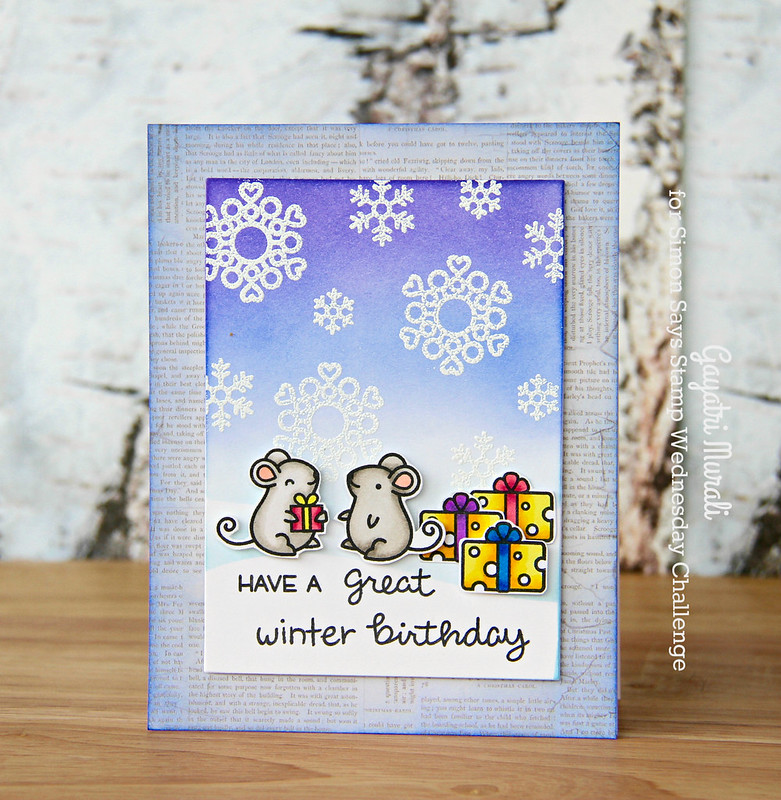
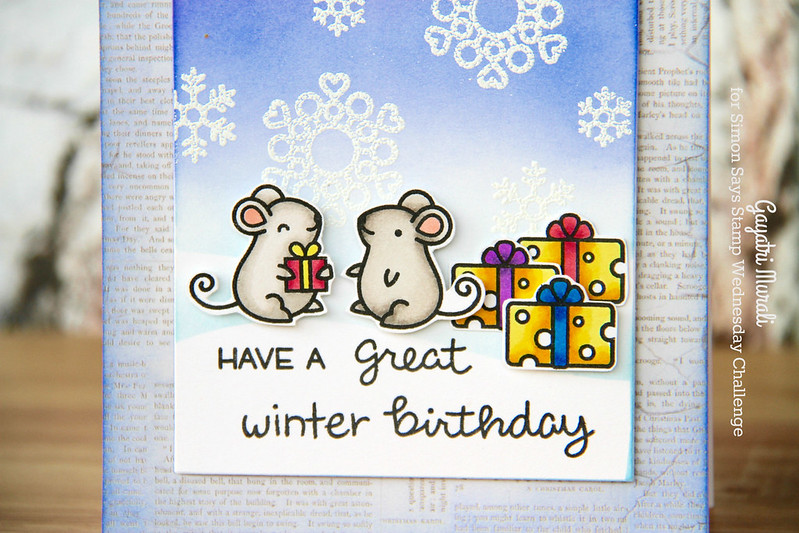
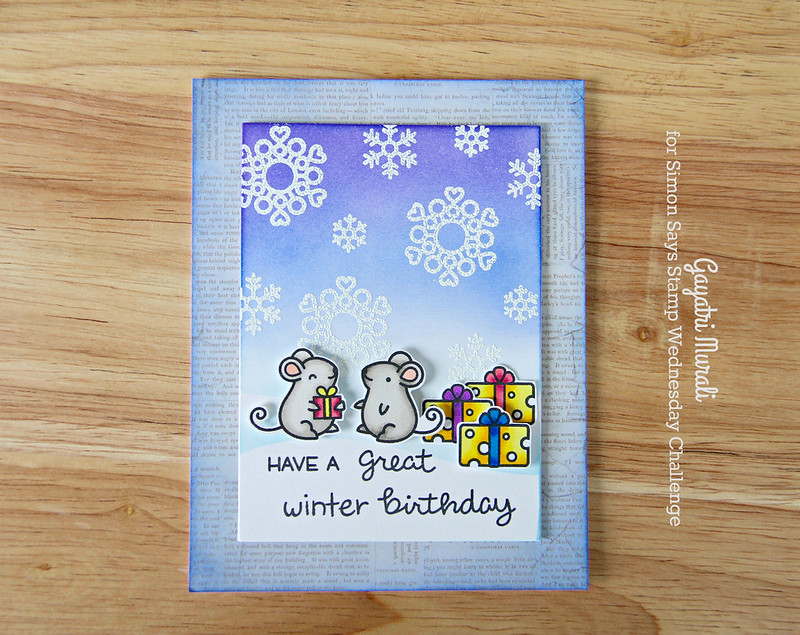
I used Lawn Fawn’s Merry Christmouse stamp set which is a Christmas stamp set to make a birthday card.
I stamped the mice and the cheese presents, coloured them with copic markers and hand cut them out. I don’t have the coordinating dies but they are available. For the winter background, I white heat embossed the snow flakes from Simon Says Stamp’s Cute Snowflakes stamp set. Then die cut snow mound using masking paper and Simon Says Stamp Stitched Slopes and Hills. Then sponged the background using distress inks – Mermaid Lagoon, Blueprint Sketch and Wilted Violet. I removed the mask and stamped the sentiment from stamp sets – Merry Christmouse and Cozy Christmas.
I adhered this panel on a script pattern paper from Kaisercraft. I sponged the edges with Blueprint Sketch distress ink. This completed panel is adhered to the card front.
Winter Birthday flat
So now it’s YOUR turn.  Happy Crafting
Do you use Instagram ?  If so please add  #ssswchallenge to your challenge entry uploads so we can see them on there too !
There are fabulous Give Aways and inspiration from fabulous designers on a daily basis over on the Simon Says Stamp Blog , if you haven’t subscribed by email you may want to so you don’t miss out.
Simon Says Stamp
You have until Wed  8am Ohio time. 1pm UK time, 2 pm CET to join in
No backlinking allowed, Only 5 new creations will be eligible in the prize draw
word-verif
Card Supplies:
Thanks for visiting my blog!

My blog signature

Taylored Expressions

A Magical Day in the Clouds!

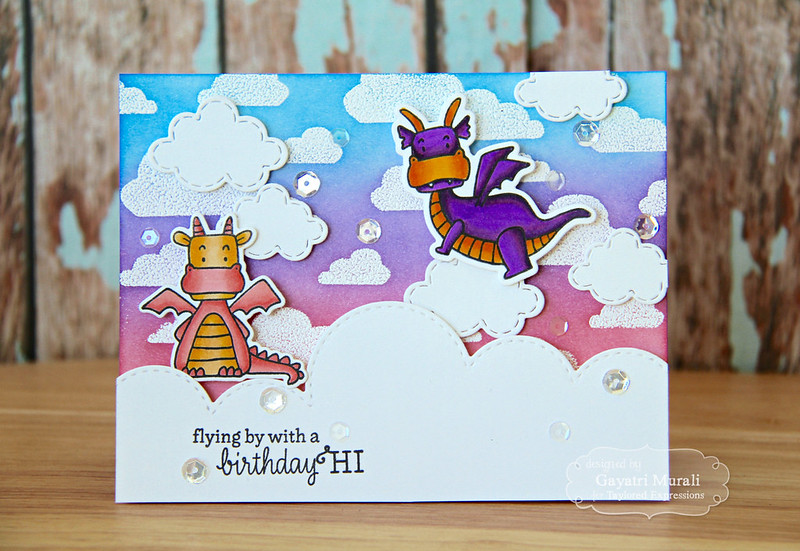
Hello and welcome back. Hope you got inspired by the new products and inspiration from Day #1 of sneak peek of Taylored Expressions January new release. Today is day #2 of the sneak peek. I am showcasing two new products today. The first product I am showcasing is a stamp and die combo called Magical Day!
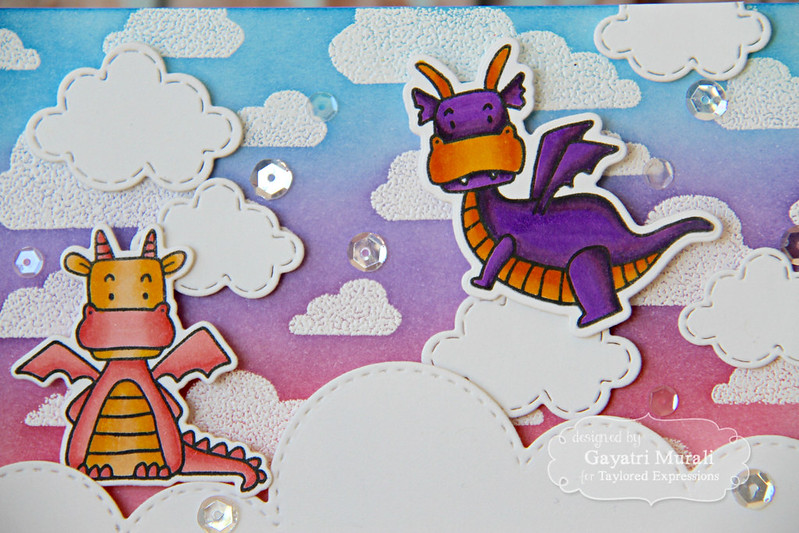
Dragons! I Looove dragons. I got carried away a little. I combined the Magical Day stamp and die combo set with Cloud Nine background stamp and Stitched Cloud Duo die.
I created the background by white heat embossing the background by stamping the new Cloud Nine Background stamp. Then I sponged distress inks – Salty Ocean, Wilted Violet and Candied Apple. I also die cut a cloud using Build a Scene Rolling Clouds die. I stamped the sentiment from the Magical Day stamp and die combo set using Oreo hybrid ink and adhered to the card front using foam adhesives.

GAYATRIMagicaldaycloseupTUE//embedr.flickr.com/assets/client-code.js

I stamped the dragon images using Oreo hybrid ink and coloured using copic markers. then I die cut them out using the coordinating dies. Then I also die cut a few of the new Stitched Cloud Duo dies. I adhered the die cut dragons using foam adhesives and the clouds die cut behind them flush. I then embellished the card using sequins from various TE sequins collections.

Card Supplies:

The second product I am showcasing is Stitched Cloud Duo dies.

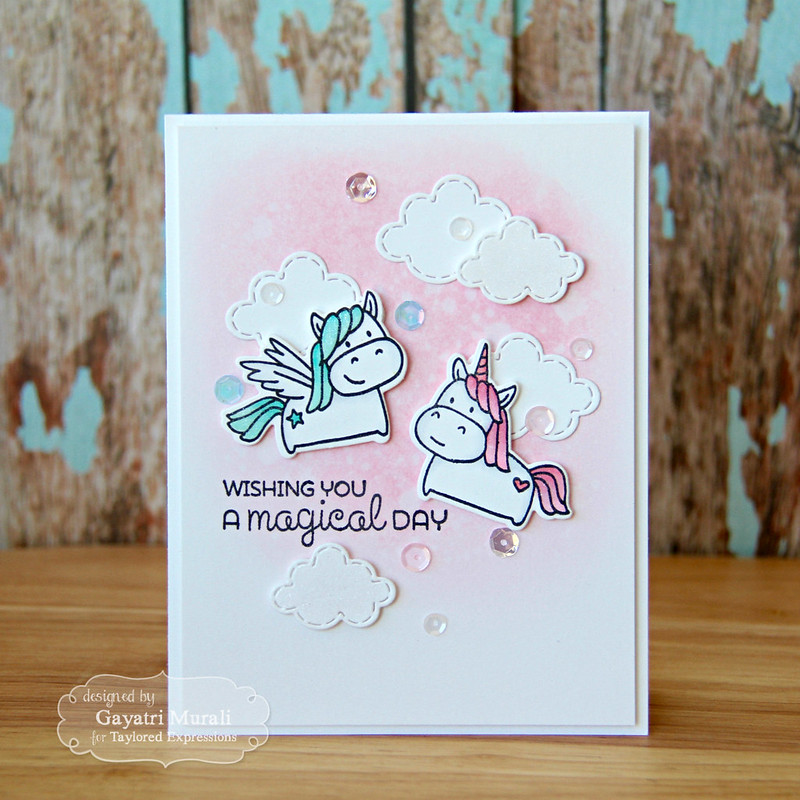
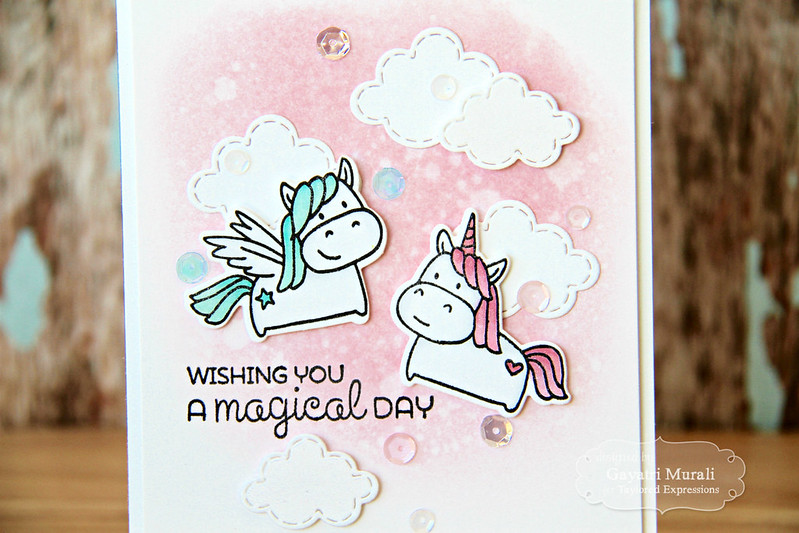
The Stitched Cloud Duo dies are cute with the stitched details. They looked awesome in my previous card with the dragons from Magical Day Stamp and Die Combo. Here I combined the Stitched Cloud Duo die with another new stamp and die combo called Dreamer.

GAYATRIStitchedcloudduoTUE//embedr.flickr.com/assets/client-code.js

I sponged the background with Spun Sugar distress inks, spattered with water. Then stamped the unicorns from Dreamer stamp and die combo, coloured with copic markers and die cut using the coordinating die. I also die cut a few of the stitched cloud dies. First I stamped the sentiment from Dreamer stamp and die combo using Oreo hybrid ink on the background. Then adhered three of the largest stitched clouds flush to the background with the unicorns overlapping of the clouds with a bit of dimension. The smaller clouds I adhered using foam adhesives. Then I embellished using sequins from various sequins collection from Taylored Expressions.

GAYATRIStitchedcloudduocloseupTUE//embedr.flickr.com/assets/client-code.js

I brushed the coloured areas of the unicorn using Wink of Stella clear shimmer pen.

Card Supplies:

https://static.inlinkz.com/ppr.js


Taylored Expressions is celebrating Release Week with some fabulous giveaways! Visit Taylored Expressions Blog to answer Taylor’s Question of the Day for a chance to win a prize from the latest release!

While you are there, check out gorgeous inspirations from the rest of the designers using the sneak peek products.

See you tomorrow with day #3 of the sneak peek.
Thanks for stopping by my blog today! 

My blog signature

Taylored Expressions

Hello BeYOUtiful!

Hello and welcome to Taylored Expressions January release!
This is day #1 of the sneak peek! There are plenty of beautiful stamp set and dies to be released on Thursday. But today I am showcasing two new products – a die and a watercolor panels.
First is the Hello Script die.
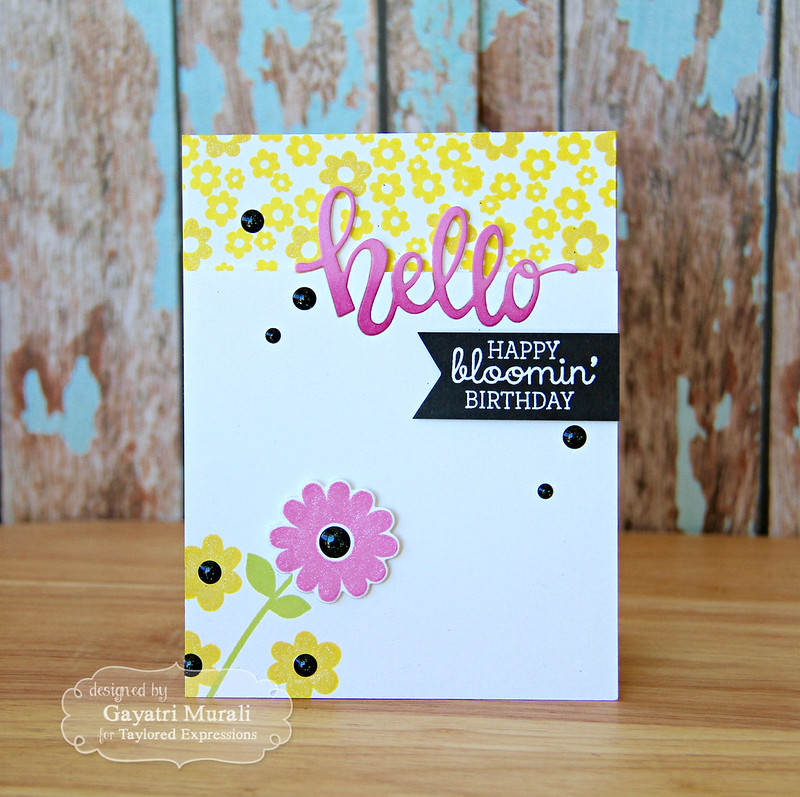
Love how rounded and flowing the script is! A great hello die is a great in your collection. You can never have enough of word dies especially Hello! I used the Hello Script die along with Bloomin’ Birthday stamp set.
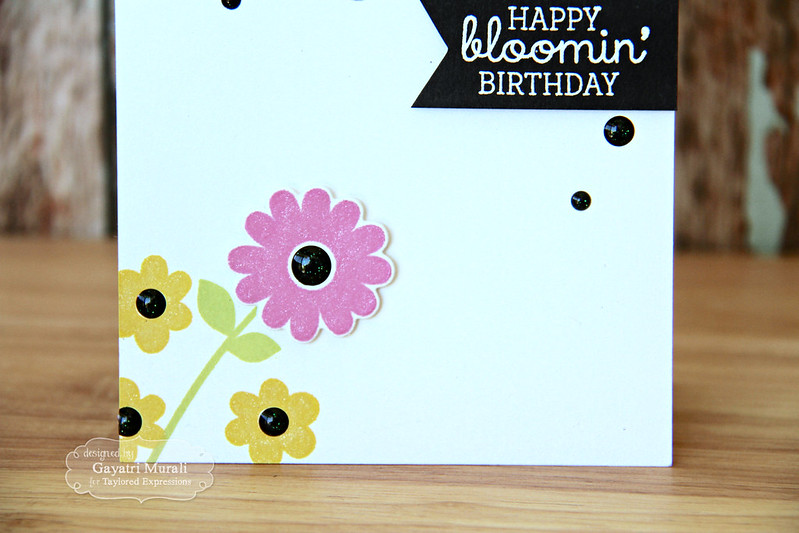
I trimmed Sugar Cube card stock to 4.25″x 4.75″ size. I die cut Hello script on the top right corner of the panel. I stamped the flowers and leaves from Bloomin Birthday stamp set on the bottom left corner of the panel using TE Lemon Meringue and Granny Smith dye inks. I stamped the bigger flower using TE Strawberry Milkshake dye ink and die cut using the coordinating die. I adhered the flower die cut on the top of the leaf stem stamped image as shown.

GAYATRIHelloscriptcloseup1MON//embedr.flickr.com/assets/client-code.js

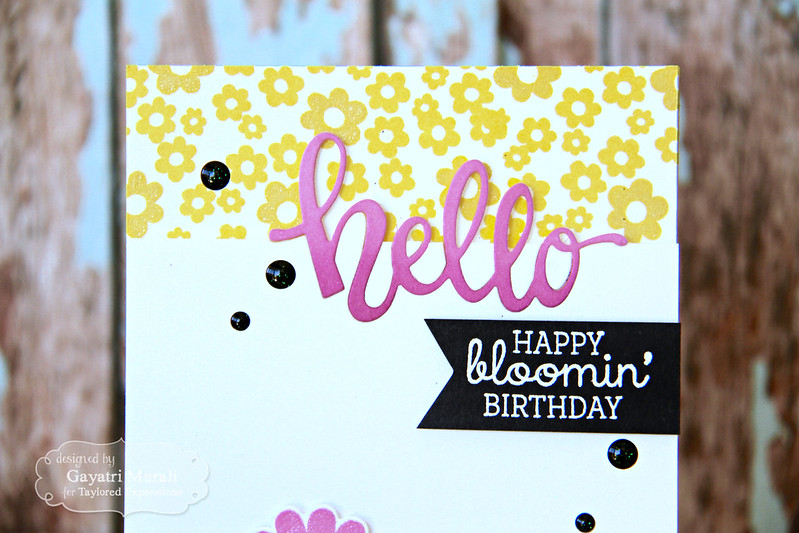
On top of the card front, I stamped the cluster of flowers from Bloomin’ Birthday stamp set using TE Lemon Meringue dye ink. Then adhered the panel on top of the card front using foam adhesives. I then sponged the Hello Script die cut using TE Strawberry Milkshake and Lollipop dye ink and inlaid the die cut back in place along with the bits and pieces.

GAYATRIHelloscriptcloseupMON//embedr.flickr.com/assets/client-code.js

I then added secondary sentiment from Bloomin’ Birthday stamp set. I white heat embossed the sentiment on Oreo cardstock, trimmed fish tail end on one side and adhered using foam adhesives. Then I embellished the flowers and the card front using Beetle Sprinkles enamel dots from Doodle Bug.

Card Supplies:

https://static.inlinkz.com/ppr.js

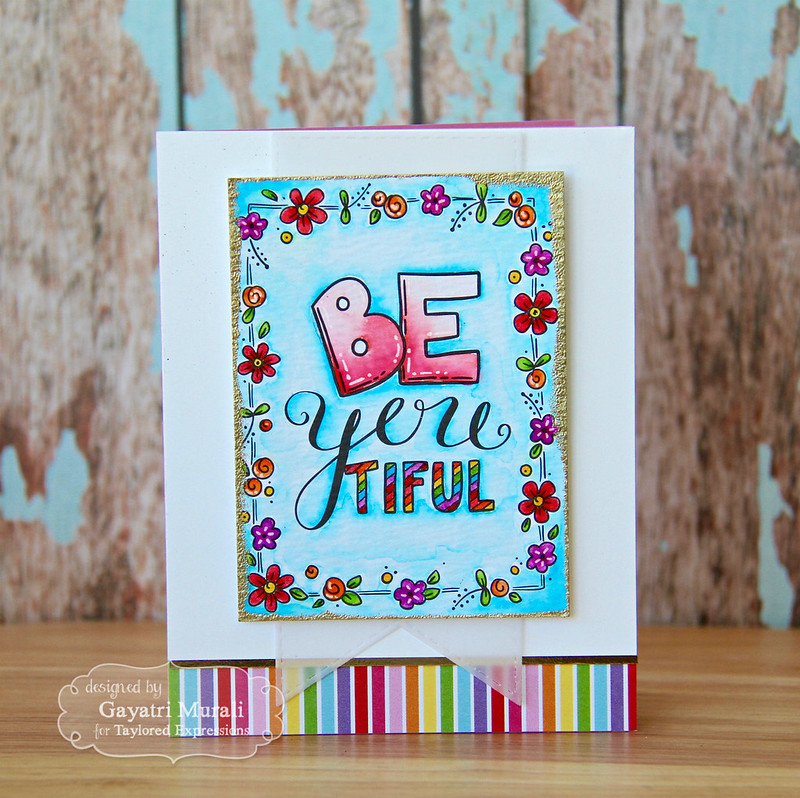
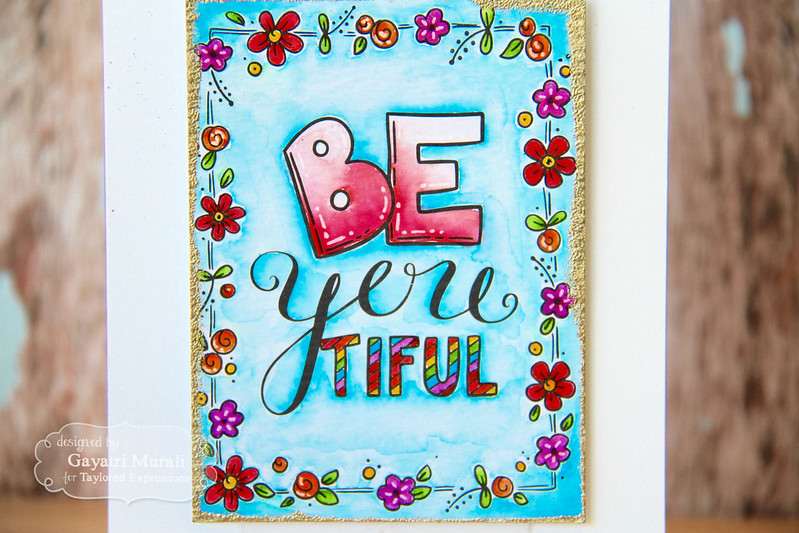
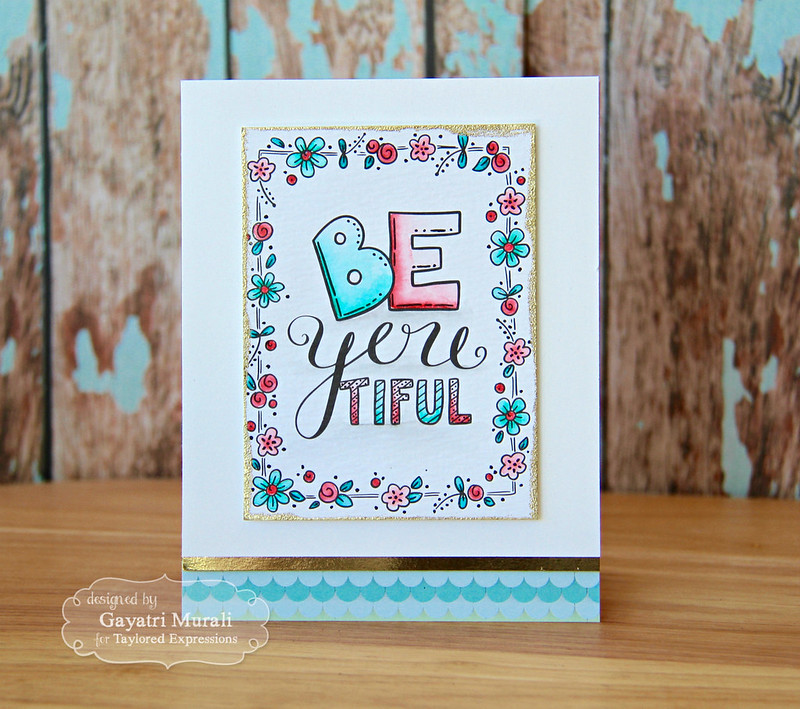
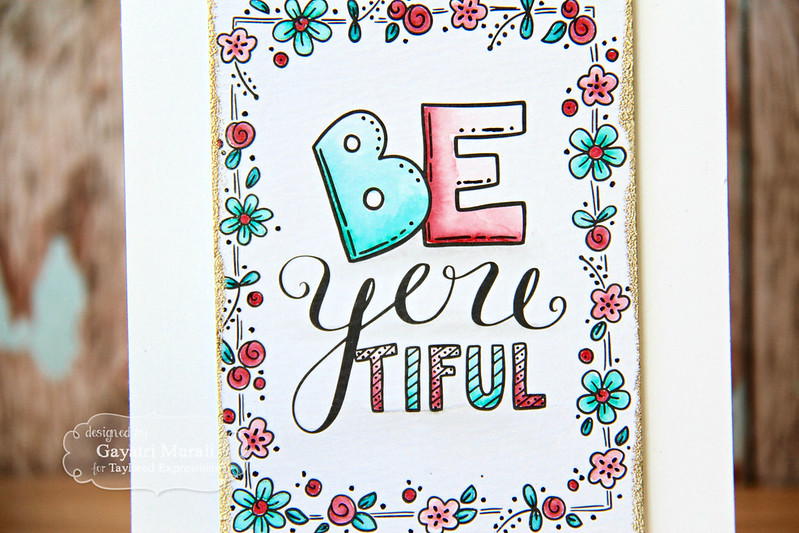
The second product I am showcasing today are the Watercolor Panels: Inspire! There are four designs and three of each in the set. I am sharing one of the designs called BeYOUtiful!

I watercoloured two of the panels and made two cards.
This panel I coloured using bright rainbow colours using Zig Clean Brush Pen.
//embedr.flickr.com/assets/client-code.js

I then added versamark to the edges of the panel and added gold embossing. To make the card I trimmed Sugar Cube panel to 4.25″x 5″ in size, adhered a strip of gold mirror cardstock. On the bottom of the card front I adhered a strip of rainbow striped pattern paper from TE Rainbow Brights pattern paper pack. Then adhered the sugar cube panel on top. I then added a stitched banner diecut die cut using the largest die from the Stitched Banner Stacklet. Finally the watercoloured panel using foam adhesives.

GAYATRIInspireBeYOUtiful1closeupMON//embedr.flickr.com/assets/client-code.js

The second card follows a similar layout except for the variation of colours on the panel, pattern paper and absence of vellum banner.

GAYATRIInspireBeYOUtifulMON//embedr.flickr.com/assets/client-code.js

The pattern paper is from Hello Happiness pattern paper pack. The inspiration for the colours came from this pattern paper. Here is a closeup of the card.

GAYATRIInspireBeYOUtifulcloseupMON

Card Supplies:

https://static.inlinkz.com/ppr.js

Taylored Expressions is celebrating Release Week with some fabulous giveaways! Visit Taylored Expressions Blog to answer Taylor’s Question of the Day for a chance to win a prize from the latest release!

While you are there, check out gorgeous inspirations from the rest of the designers using the sneak peek products.

See you tomorrow with day #2 of the sneak peek.
Thanks for stopping by my blog today! 

My blog signature